Plastic Welding Machine
A hot plate welder I built from scratch to turn a pile of plastic slices into one solid electrolyzer stack.
My first full-time job out of college was on the electrolyzer team at Terraform Industries. Terraform makes natural gas out of sunlight, water, and air, and the electrolyzer is the part that splits water into hydrogen and oxygen. When I joined, it was a long way from a mature product.
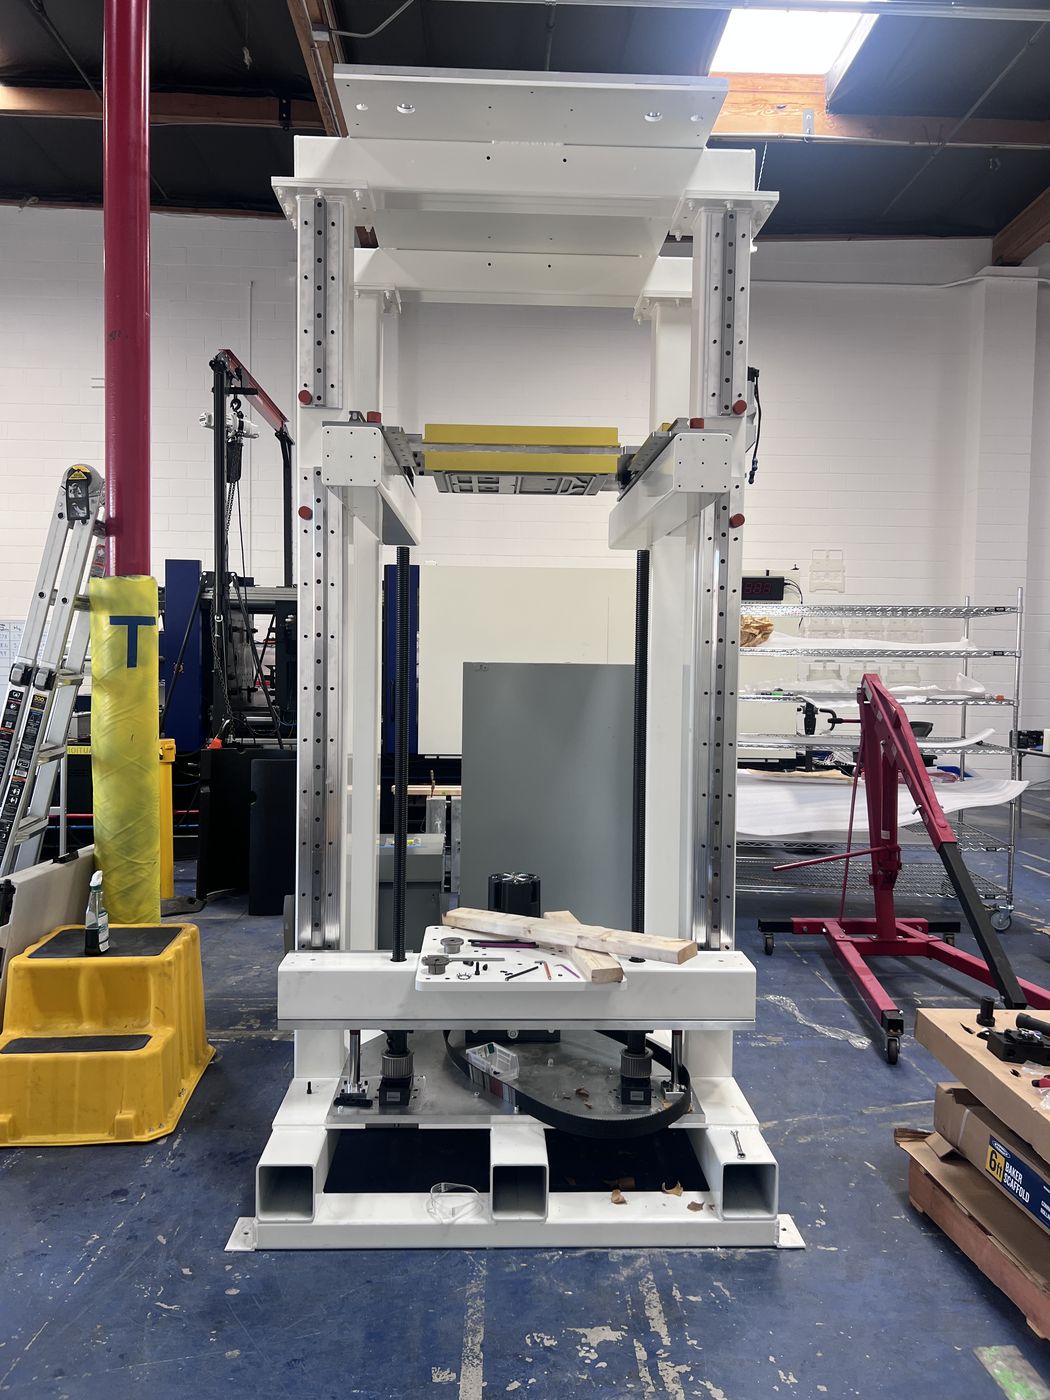
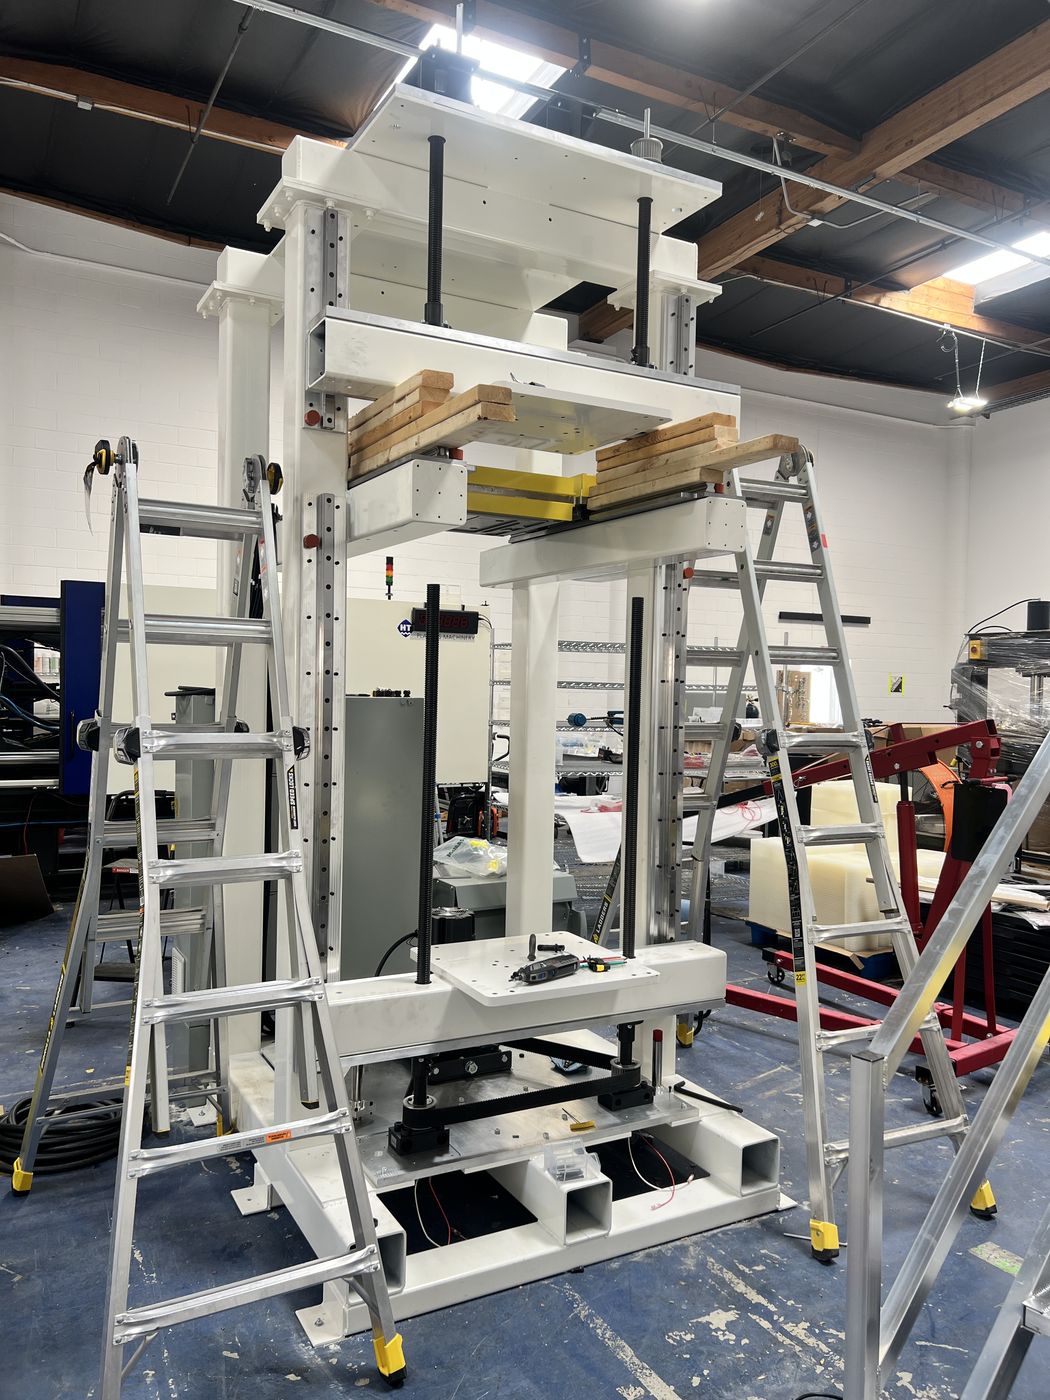
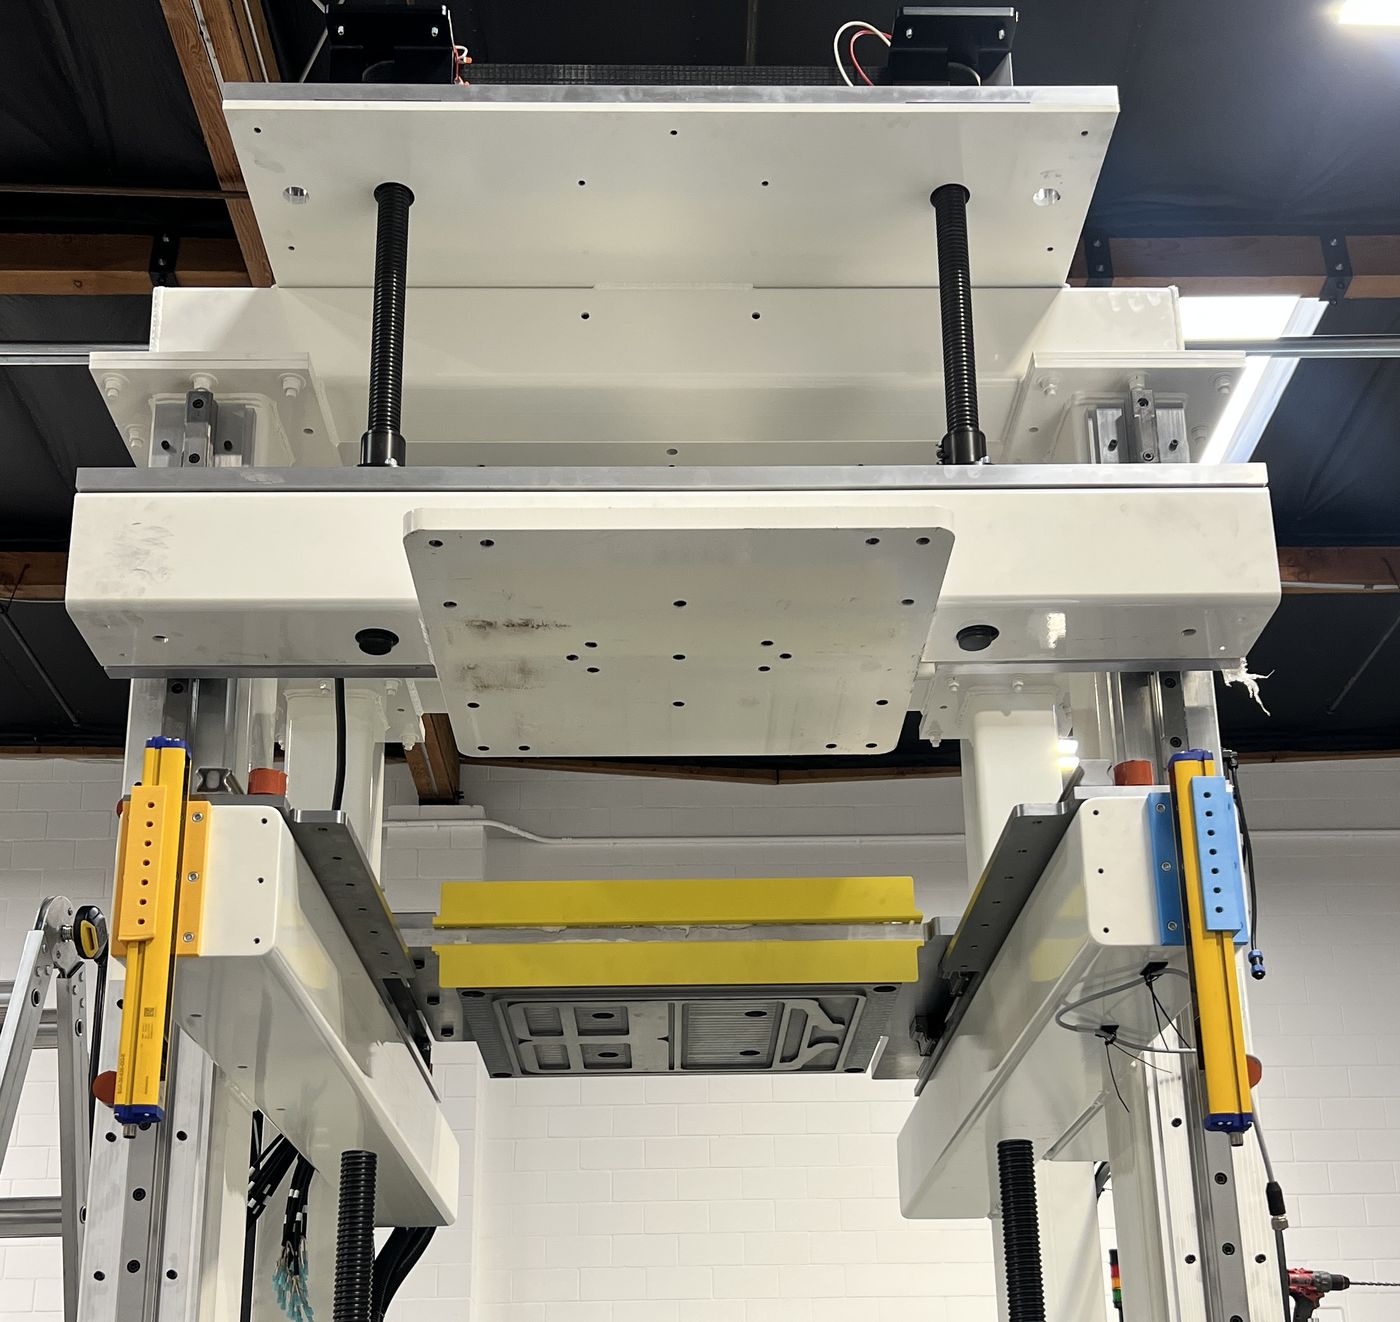
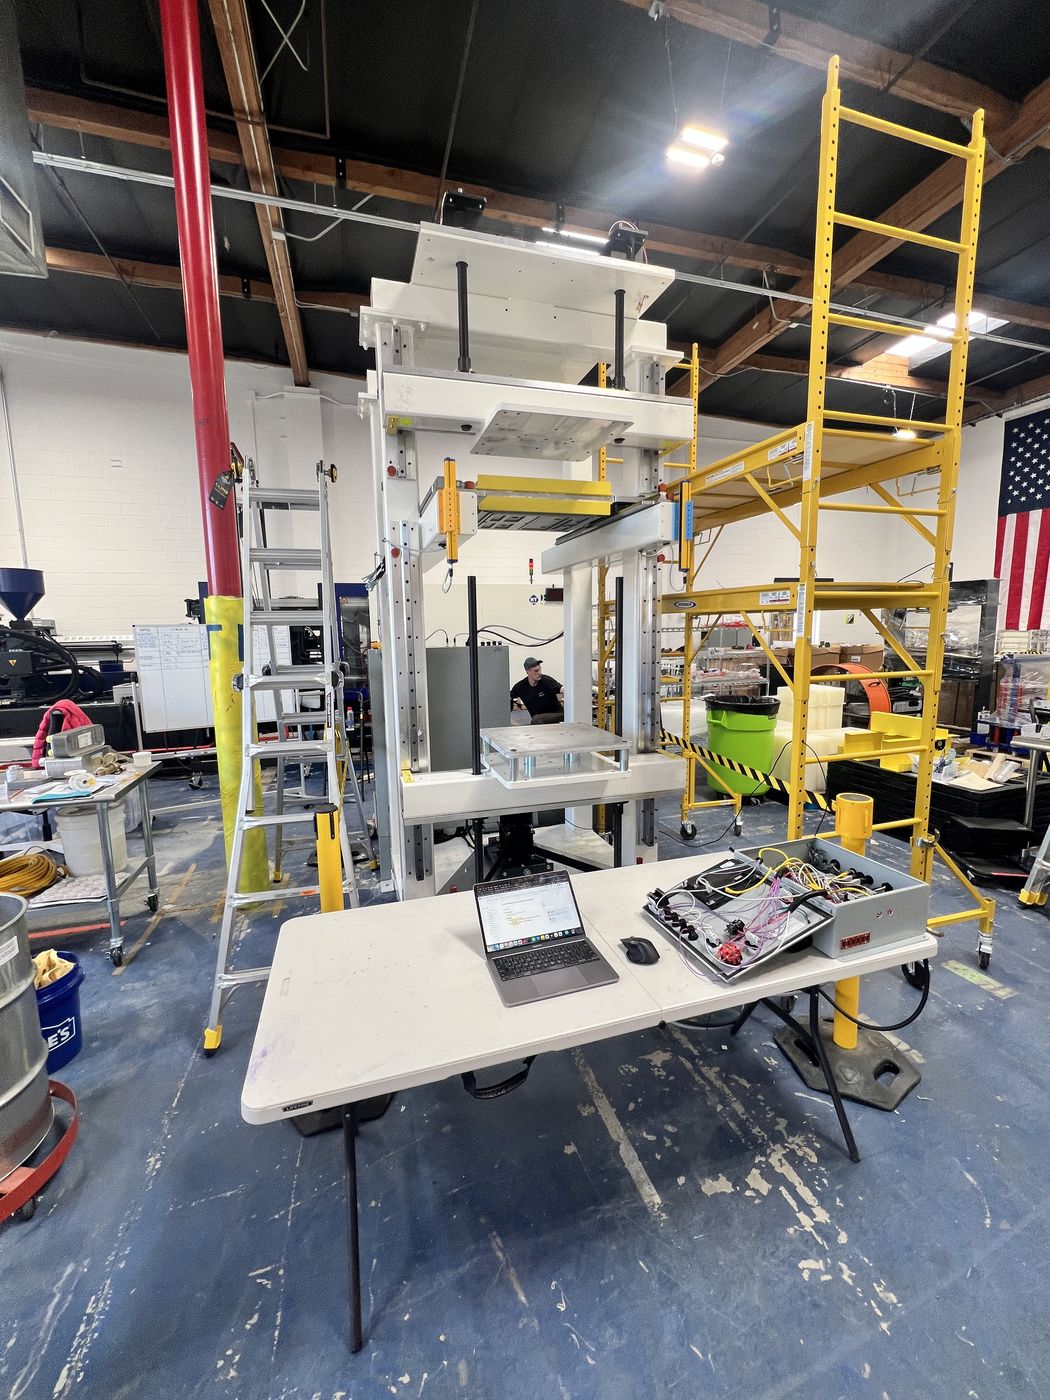
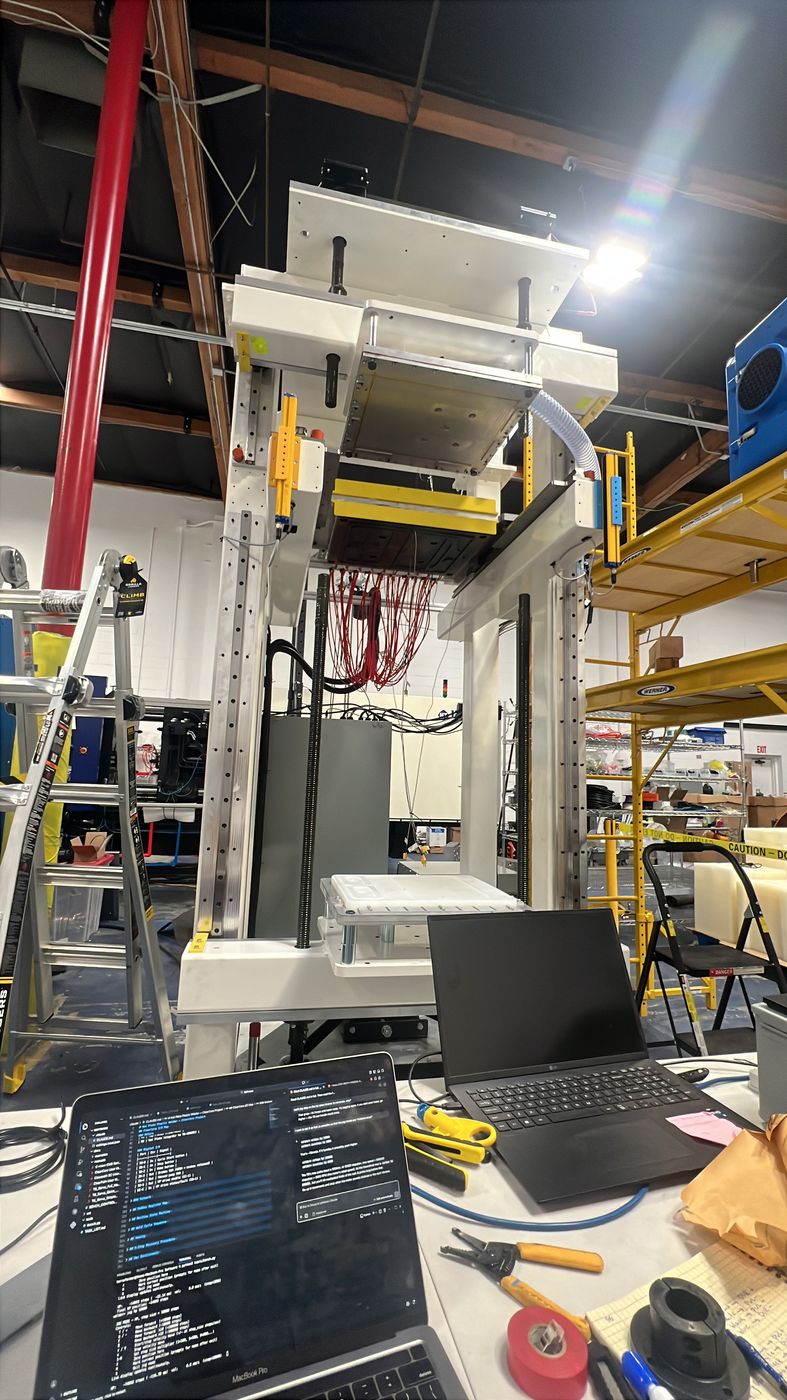
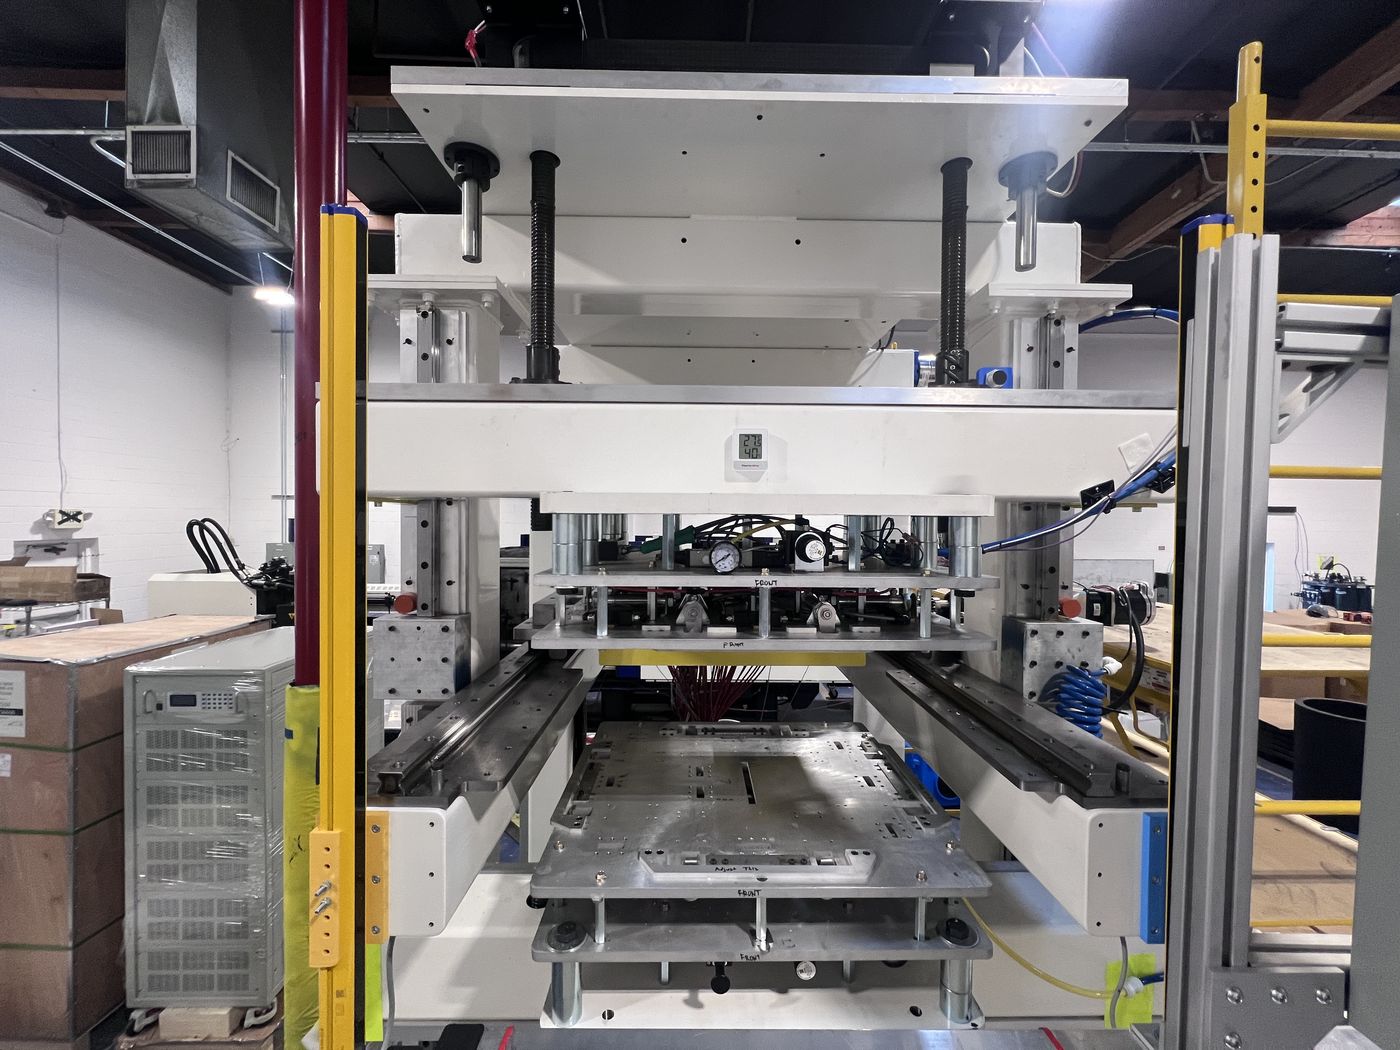
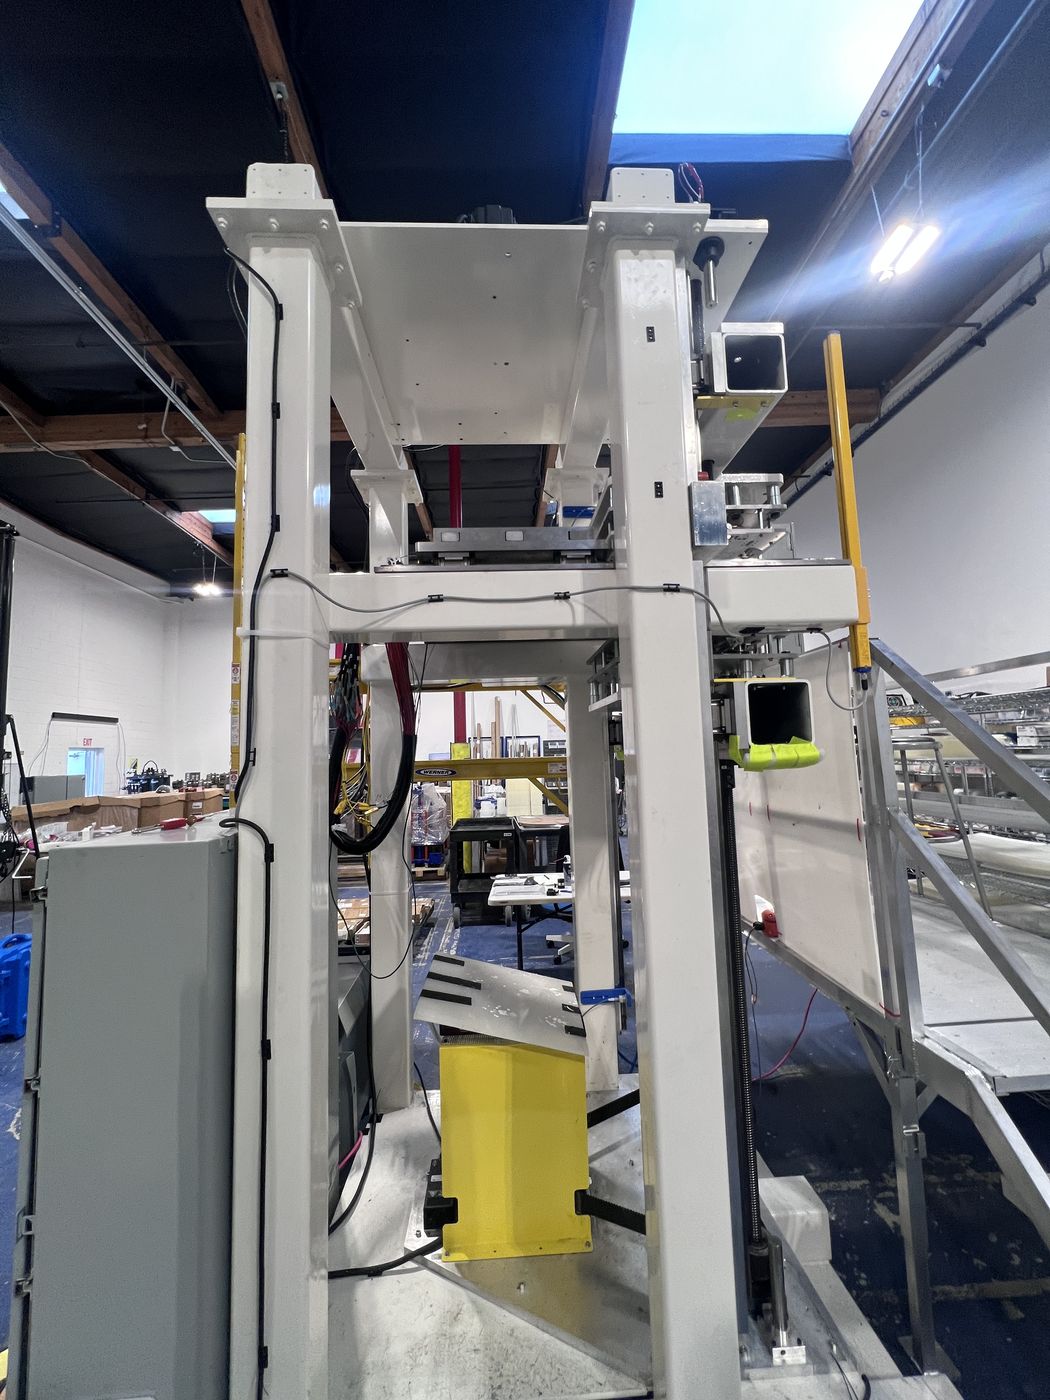
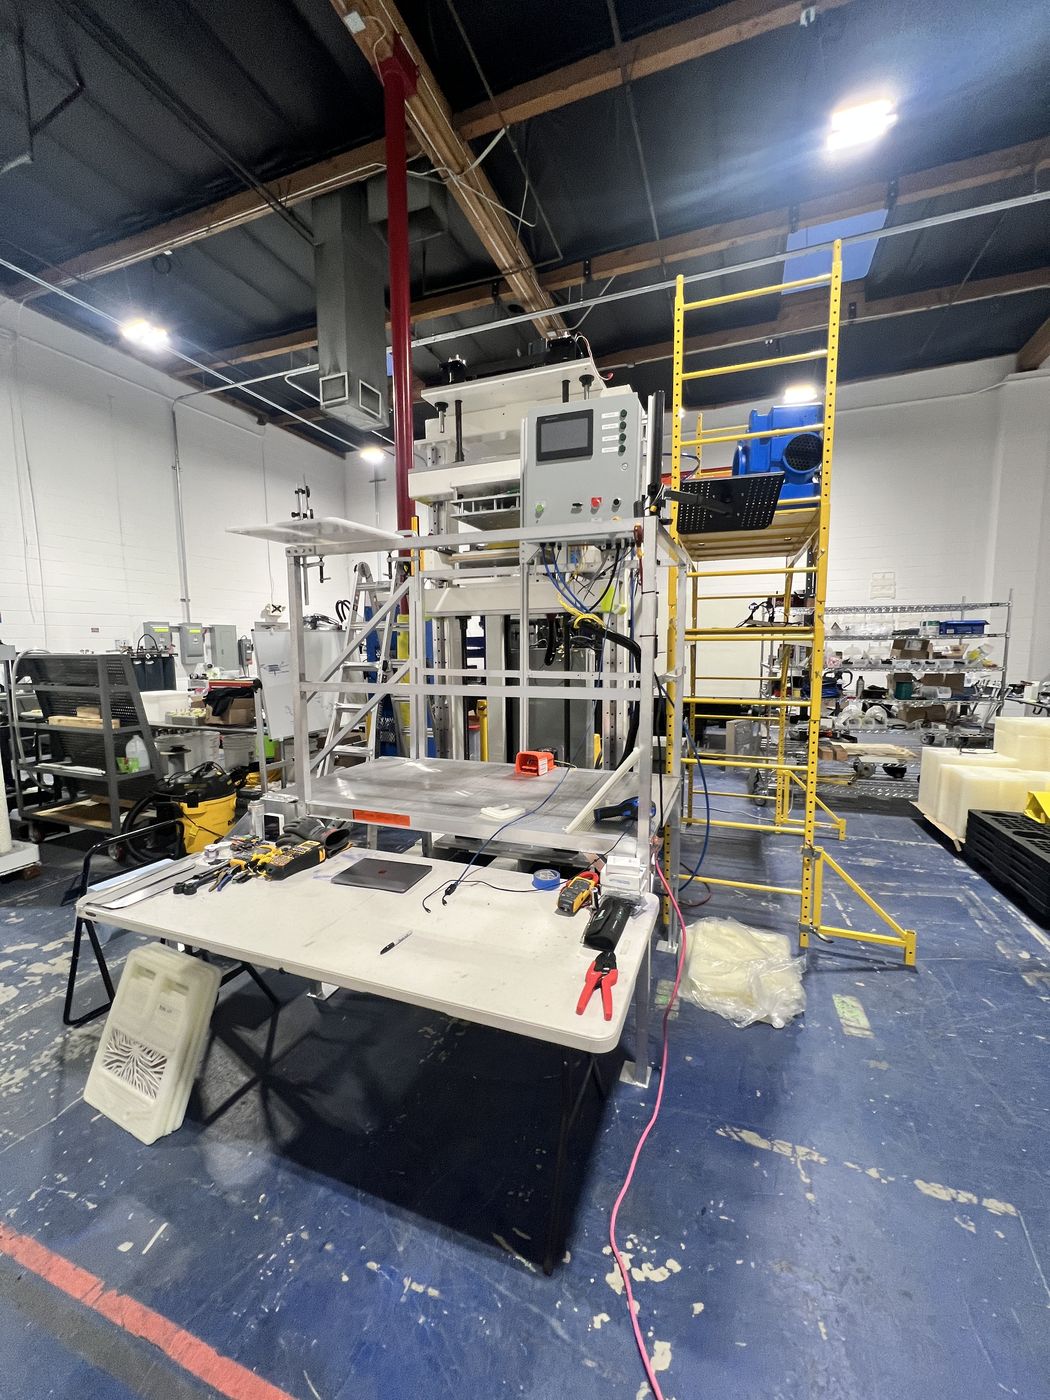
The thing I'm proudest of from that time is a machine: a hot plate welder, taller than I am, that fuses a pile of plastic slices into a single solid electrolyzer stack. I like to think of it as a very large panini press.
The Trouble with Squeezing
Underneath everything, an electrolyzer stack is a manifold. Three fluids move through it (hydrogen, oxygen, and a liquid electrolyte), and each one has to stay in its own channels as it threads past the electrodes and separators layered inside every cell. Keep them apart and you make gas. Let the hydrogen and oxygen find each other and you have a much bigger problem.
Industry builds stacks out of machined stainless steel plates, gaskets, and carefully ground sealing faces, and runs them cool and calm, where nothing creeps and nothing surprises anyone. It works beautifully. It also costs orders of magnitude more than we could ever afford, and if Terraform had gone that way, we would have died.
Terraform's bet was on something stupidly simple instead: cheap, fast to make, and able to work anywhere. That meant plastic. Physics has no objection (a plastic stack is not an impossible configuration of atoms), but making one quickly, cheaply, and reliably turned out to be a very different problem.
Our stacks were built from injection-molded polypropylene slices and sealed the obvious way, by squeezing. You stack the slices, compress the whole sandwich, and let the seals do their job. A small stack can be bolted around its edge, but a full-size one needs threaded rods running its entire length, and holding even pressure over that distance is a running battle with slack and tolerance stack-up. Warm the stack up in operation and the plastic relaxes, so seals that were perfectly tight on the bench start to weep.
My first projects all circled this problem. I wrote the leak tests, helped bring slice molding in-house, and then took on assembly itself. The original design sealed with O-rings in milled grooves, but the grooves were roughly rectangular and the O-rings were round, long, and floppy, so they refused to stay put. I discovered that wrapping each one in Vaseline would hold it in its groove, and I felt very smart about it right up until I had done it a hundred times.
Flat gaskets replaced the O-rings and made assembly about ten times faster. That got us to our first full-size stacks and let us iterate quickly on the slice design, but it was still slow: three of us working all day could build only a small fraction of a stack.
So I did what engineers do and went after the process, with fixtures, datums, automation, anything that would make assembly faster and more repeatable. It took me a few weeks to notice I had walked into the oldest trap there is, the one every engineer gets warned about and falls into anyway. I was optimizing a process that shouldn't exist in the first place. No fixture was going to make dozens of compression seals trustworthy, because the architecture itself was the problem.
Why Weld?
If squeezing was the problem, the fix was to stop depending on it. Weld the slices together and the stack stops being a sandwich held shut by force and becomes one continuous piece of plastic, with nothing to compress and nothing to assemble by hand. It was the only idea I could find that solved sealing and assembly at the same time.
Why not mold the whole thing in one shot? A finished stack is roughly as long as a person is tall, weighs hundreds of pounds, and is riddled with internal channels, which puts it far beyond any injection molding machine. For a part that big with that much going on inside it, welding is really the only good way to make it.
I pushed for welding for months. The answer was always some version of "yes, eventually," and honestly that was fair, because the gasketed stacks were working well enough to keep the rest of the program moving.
That changed in late 2025. As we scaled up to running many stacks together, we struggled to test them reliably, and it became clear the program couldn't move any further on the stacks we had. We had wrung everything we could out of the gasketed architecture, and welding was no longer "eventually."
A teammate found a company that builds industrial hot plate welders, and their quote came back in the hundreds of thousands of dollars, with months of development before we'd see a machine. I couldn't get my head around it. Hot plate welding is about as dumb as physics gets: you hold a very hot piece of metal and move plastic around it. How could that cost so much?
So I made my boss an offer. I would build it myself, for a small fraction of the price, in two months. The reply was more or less, "By yourself, in two months? Knock yourself out." I took that as a yes.
How Do You Weld a Stack?
Hot plate welding really is simple. Two platens each hold a plastic part, and a steel plate heated past the plastic's melting point slides in between them. Both parts press against the plate until their faces melt. Then the platens back off, the plate gets out of the way, and the platens press the two molten faces together and hold them while the plastic cools. What comes out is a single solid part.
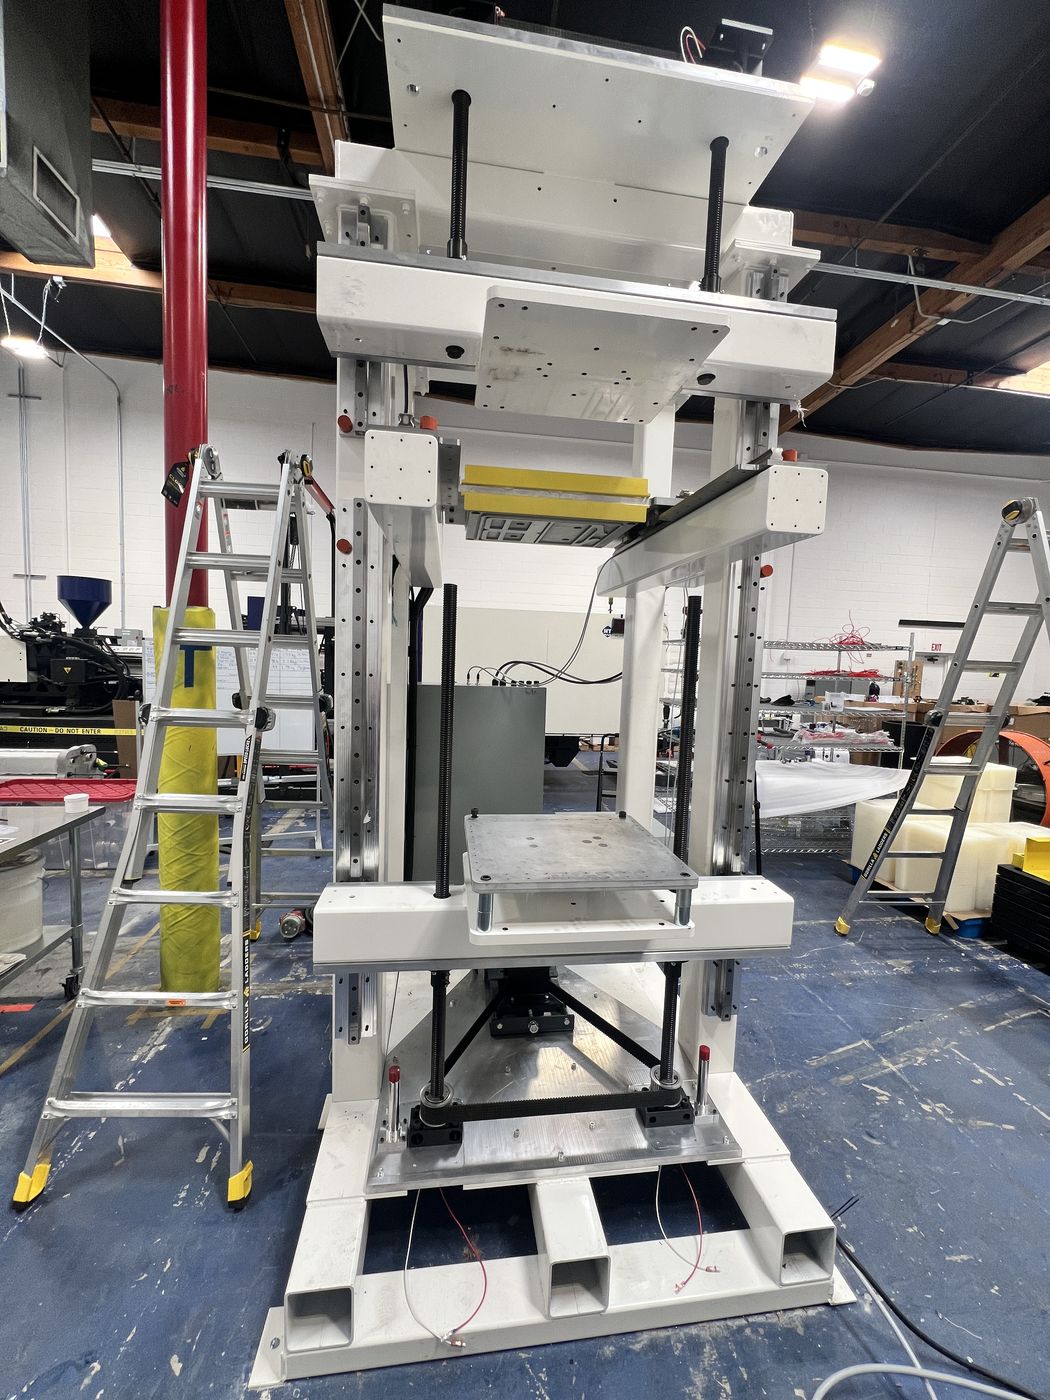
Most machines do that once and they're done. Ours had to do it over and over on the same part. The bottom platen holds the stack, which grows by a slice every cycle and gets taller and heavier all day, while the top platen only ever holds the one slice being added. That's why the machine stands upright, with the platens moving vertically and the hot plate traversing sideways into the gap between them.
Vibration and ultrasonic welding are common too, especially in the fuel cell world. I'd be lying if I said the sheer fun of watching plastic melt and fuse had nothing to do with picking hot plate (it had a lot to do with it). The better argument was fit. Our molding machine was already turning out slices at a steady clip, and a hot plate welder could take them more or less straight off the line.
There is one catch, and it shapes everything else. Polypropylene is a lousy conductor of heat; for practical purposes it's an insulator. Each slice carries raised weld ribs around every interface that has to seal (they double as the structural joint), and heat has to soak from the plate down through each rib before it melts. A hotter plate pushes heat in faster, which is why industrial machines run hot, and why I planned to as well.
With the process settled, most of the requirements fell out of a single goal: a full stack every working day. A stack is a couple hundred slices, which means a couple hundred welds, and that sets the time budget for each one:
Divide a working day by a couple hundred and you get a few minutes per weld. That has to cover loading the slice, melting both faces, welding, and cooling, so every axis of the machine had to move fast enough to fit inside it.
Speed couldn't come at the cost of precision, though. Every slice has to land straight and square on the one below it, because any error repeats with every weld, and a tall stack with a slight lean in each layer walks off-axis fast. Then there were the constraints of a real shop: fit on our floor, run on the power the building already had, and heat up in a reasonable time. Over all of it sat safety. This was going to be a big, hot, fast-moving press, and nobody could ever get hurt by it.
A Big Block of Steel
The hot plates are where the physics lives, so I started there. Each one is a big block of steel, and the size is deliberate. Every weld pulls a slug of energy out of the plate, and the plate's temperature drops by about
where is its mass and is the specific heat of steel. Make the plate heavy enough and all but disappears, so every slice melts against the same temperature no matter how hard the machine is working. Mild steel also happens to be cheap, easy to buy, and stiff when hot, which settled it.
All that thermal mass splits heater sizing into two separate questions. The first is warm-up. Heating a cold block of steel takes a lot of power, but only once a day, and it only has to happen in a reasonable time. The second is recovery: between welds, the heaters have to pay back what the last slice took, plus whatever the plate loses to the room.
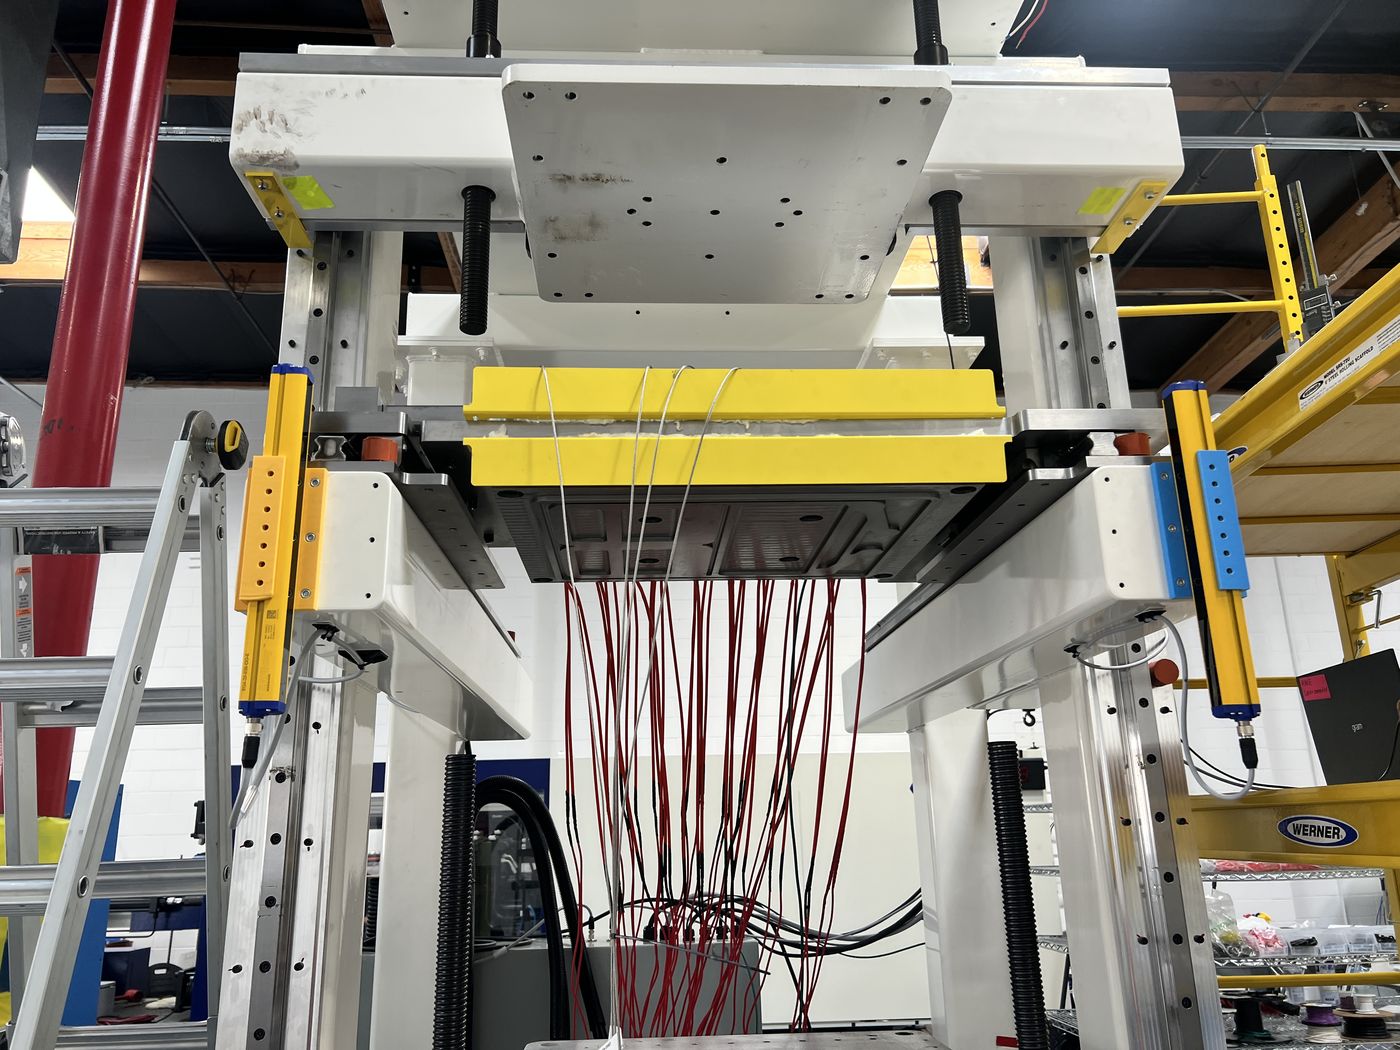
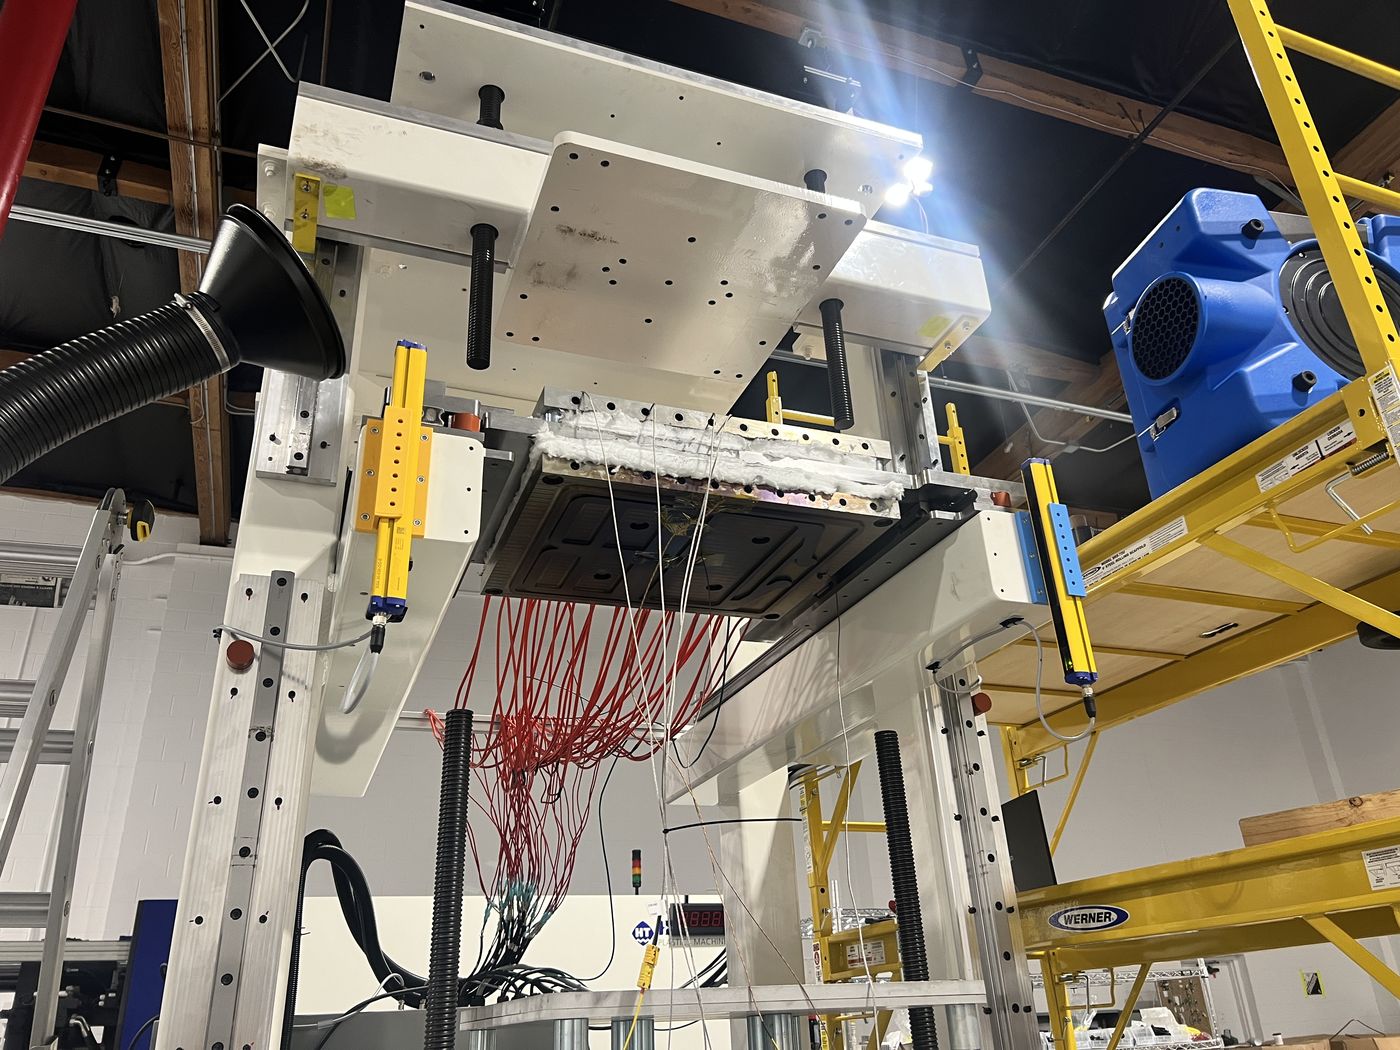
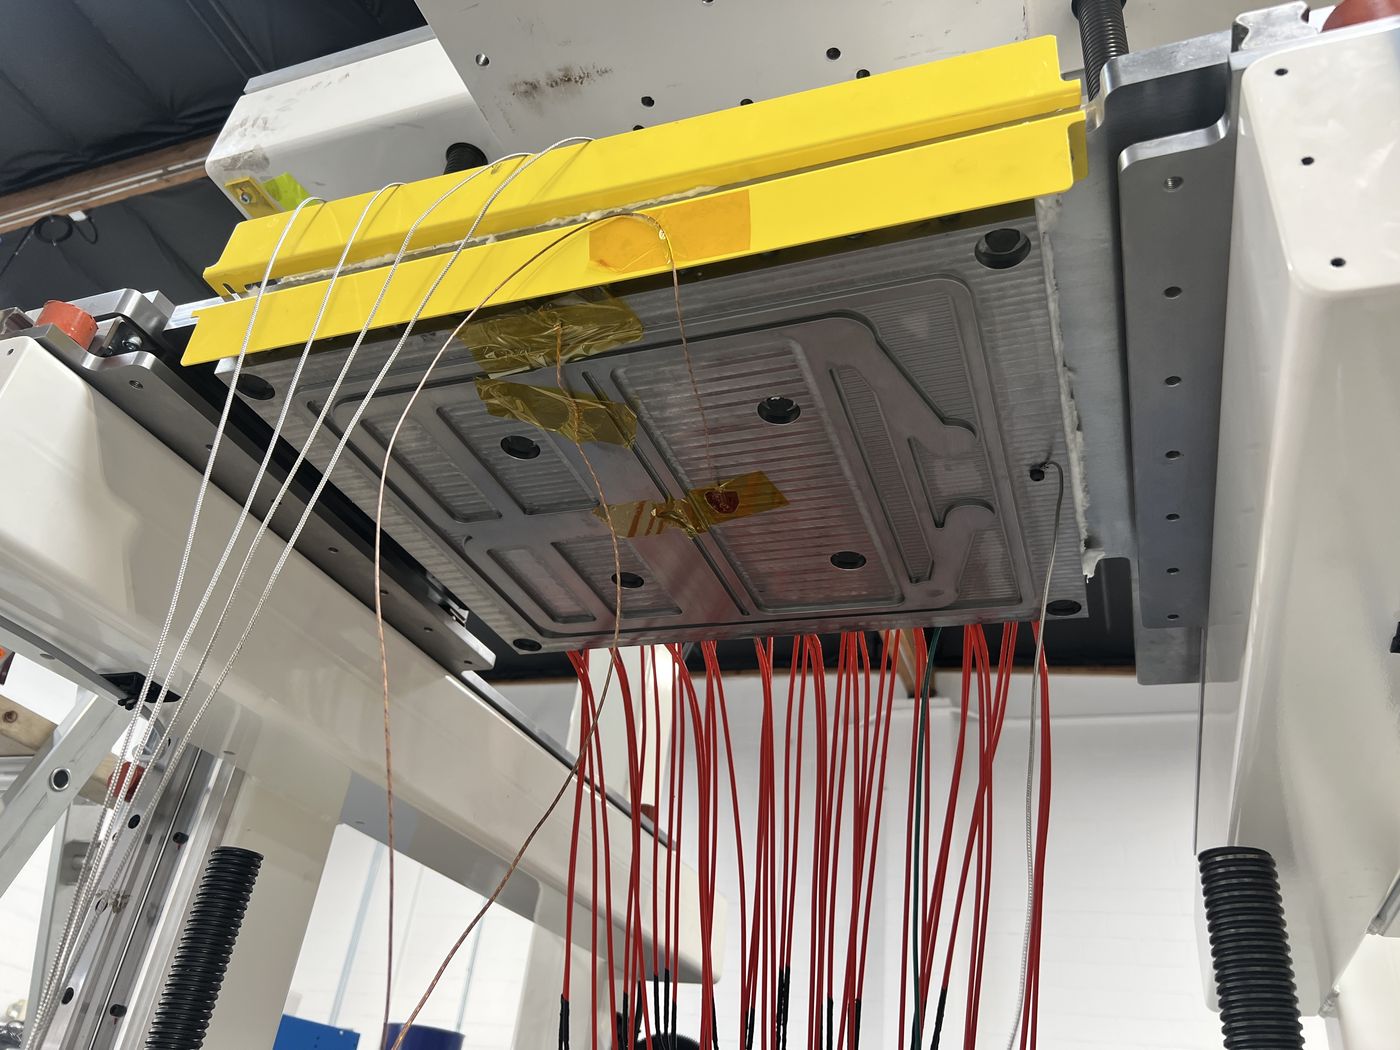
Between them, those two put the heaters in the tens of kilowatts, which I spread across a row of cheap cartridge heaters slid into long bores through each plate.
The face of each plate is a map of the slices' weld ribs, with raised pads where the ribs land and recesses everywhere else so the rest of the slice doesn't cook. I couldn't decide what to coat it with. PTFE is non-stick like a frying pan but breaks down if it gets too hot, while hard chrome shrugs off almost anything. Rather than settle it on paper, I designed the steel core to take swappable coated inserts, which let me put off the decision until the machine itself could weigh in.
The Rest of the Press
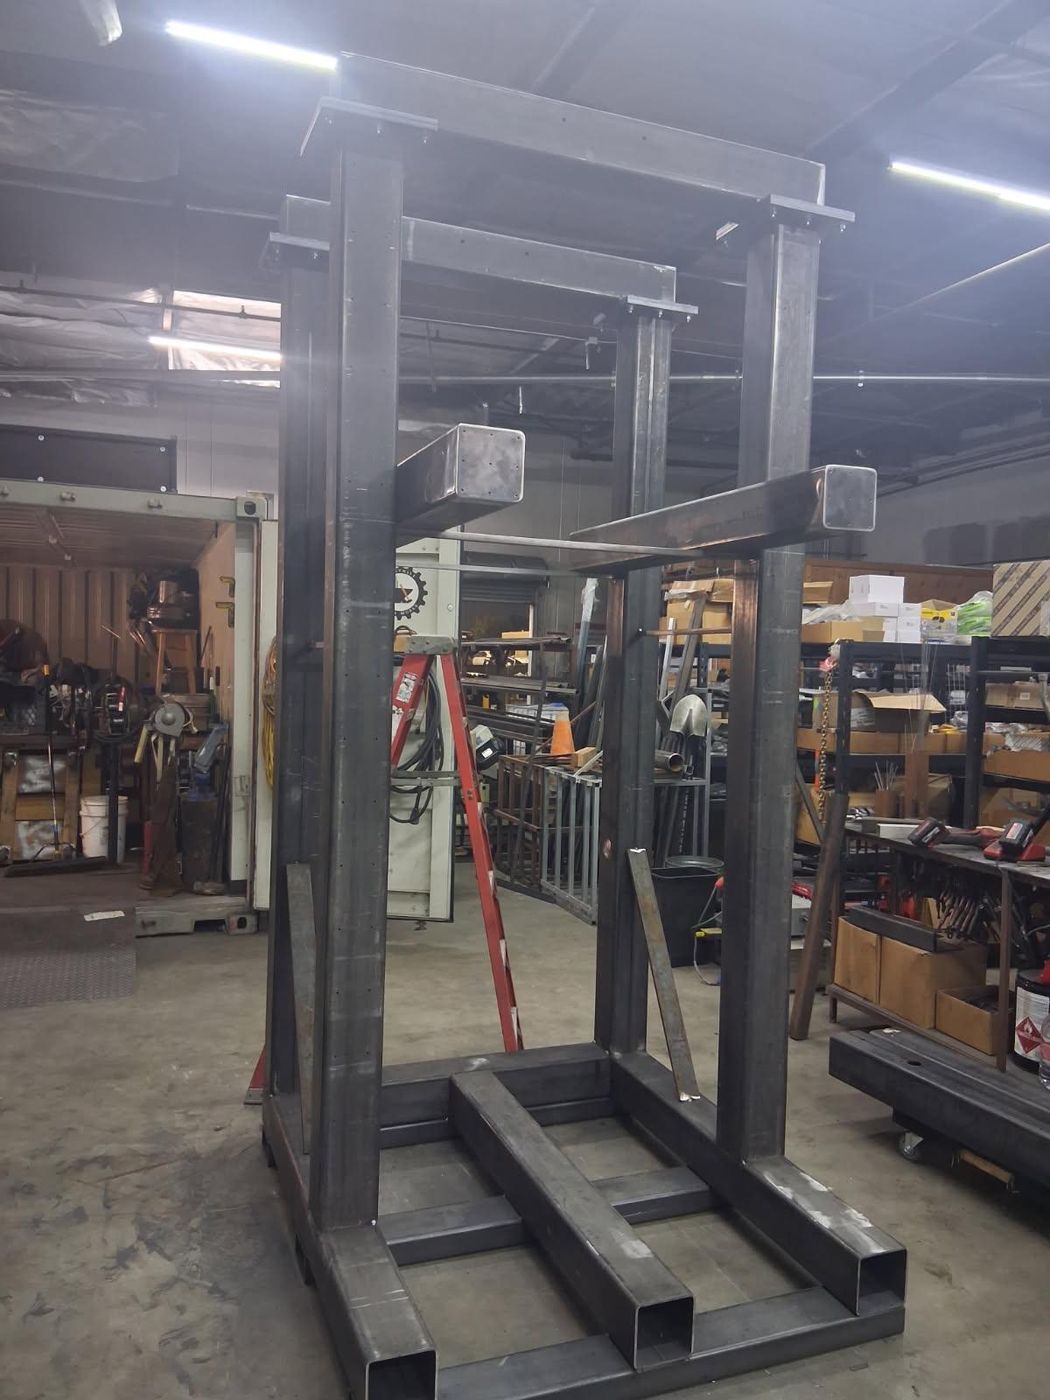
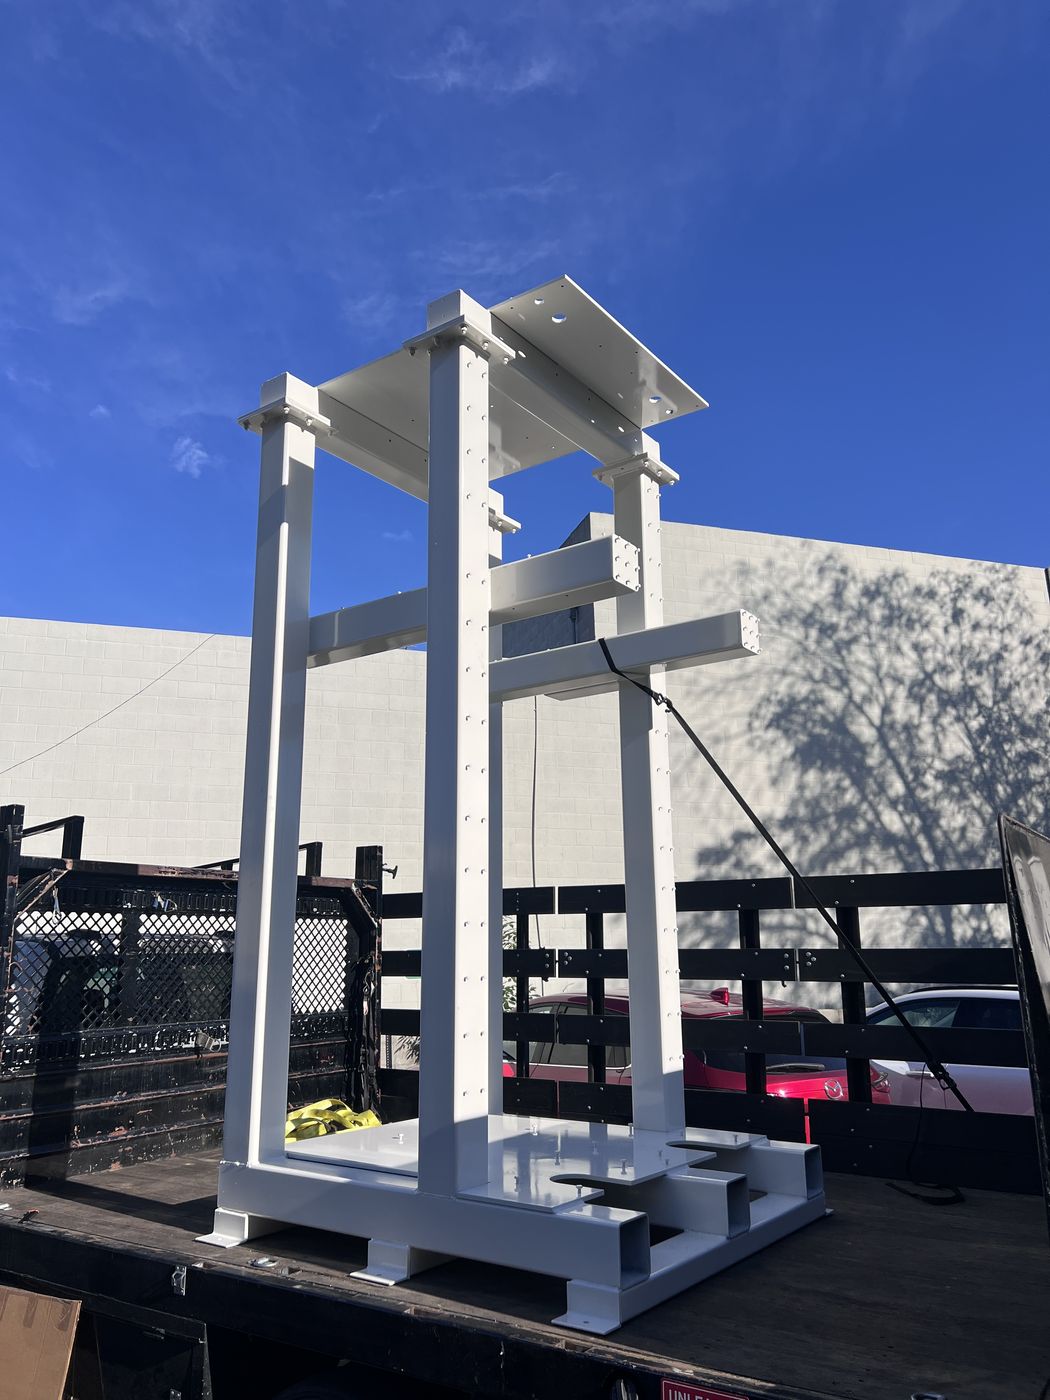
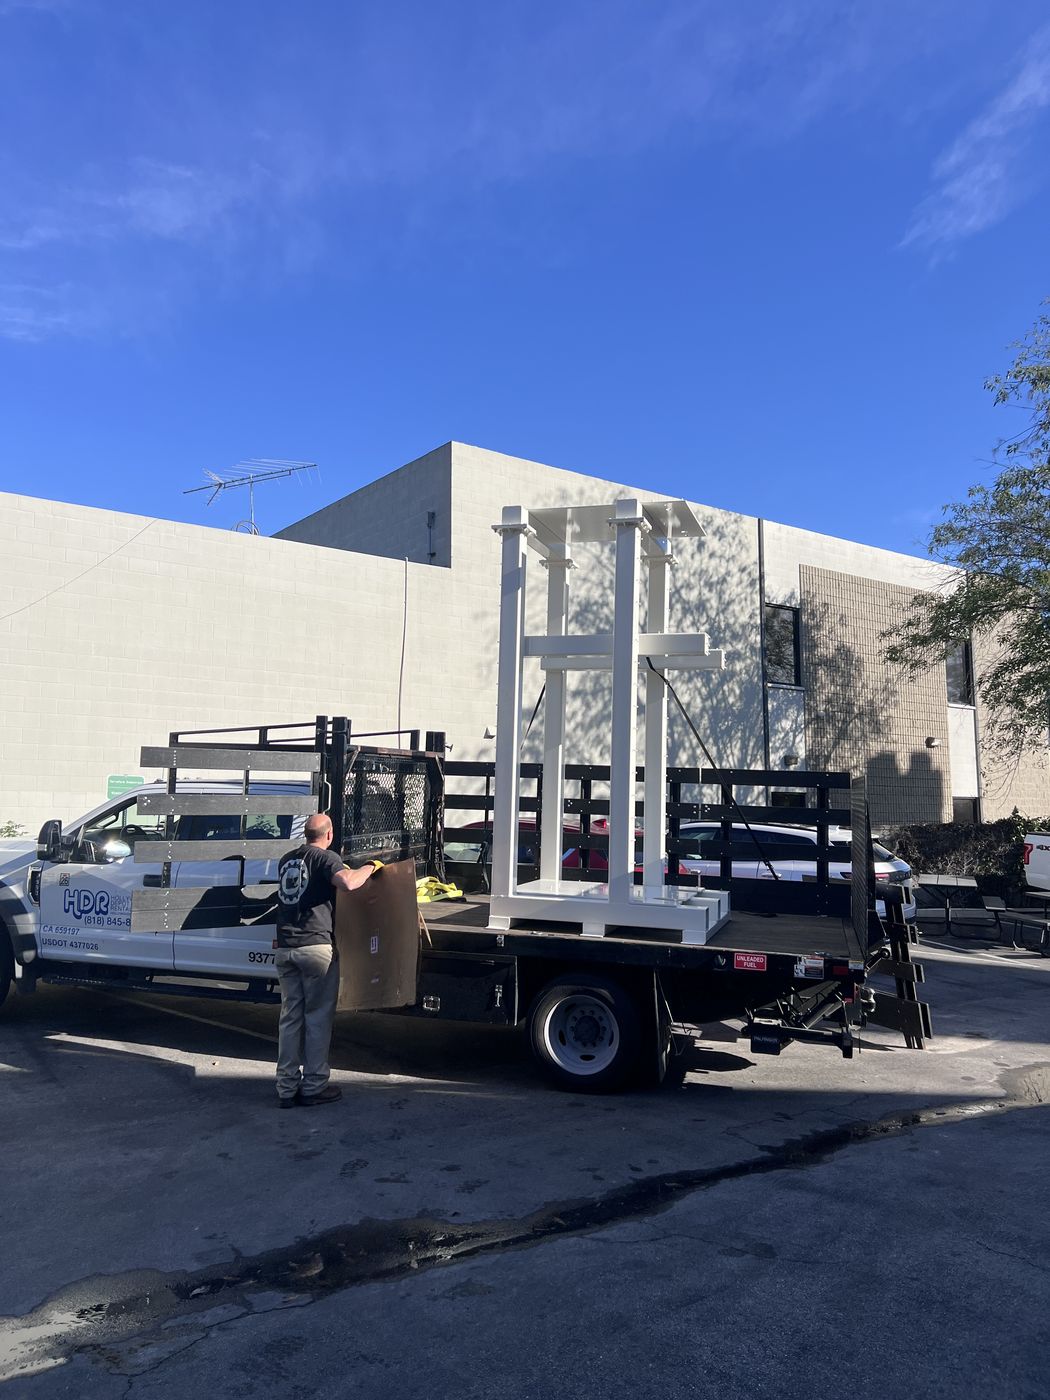
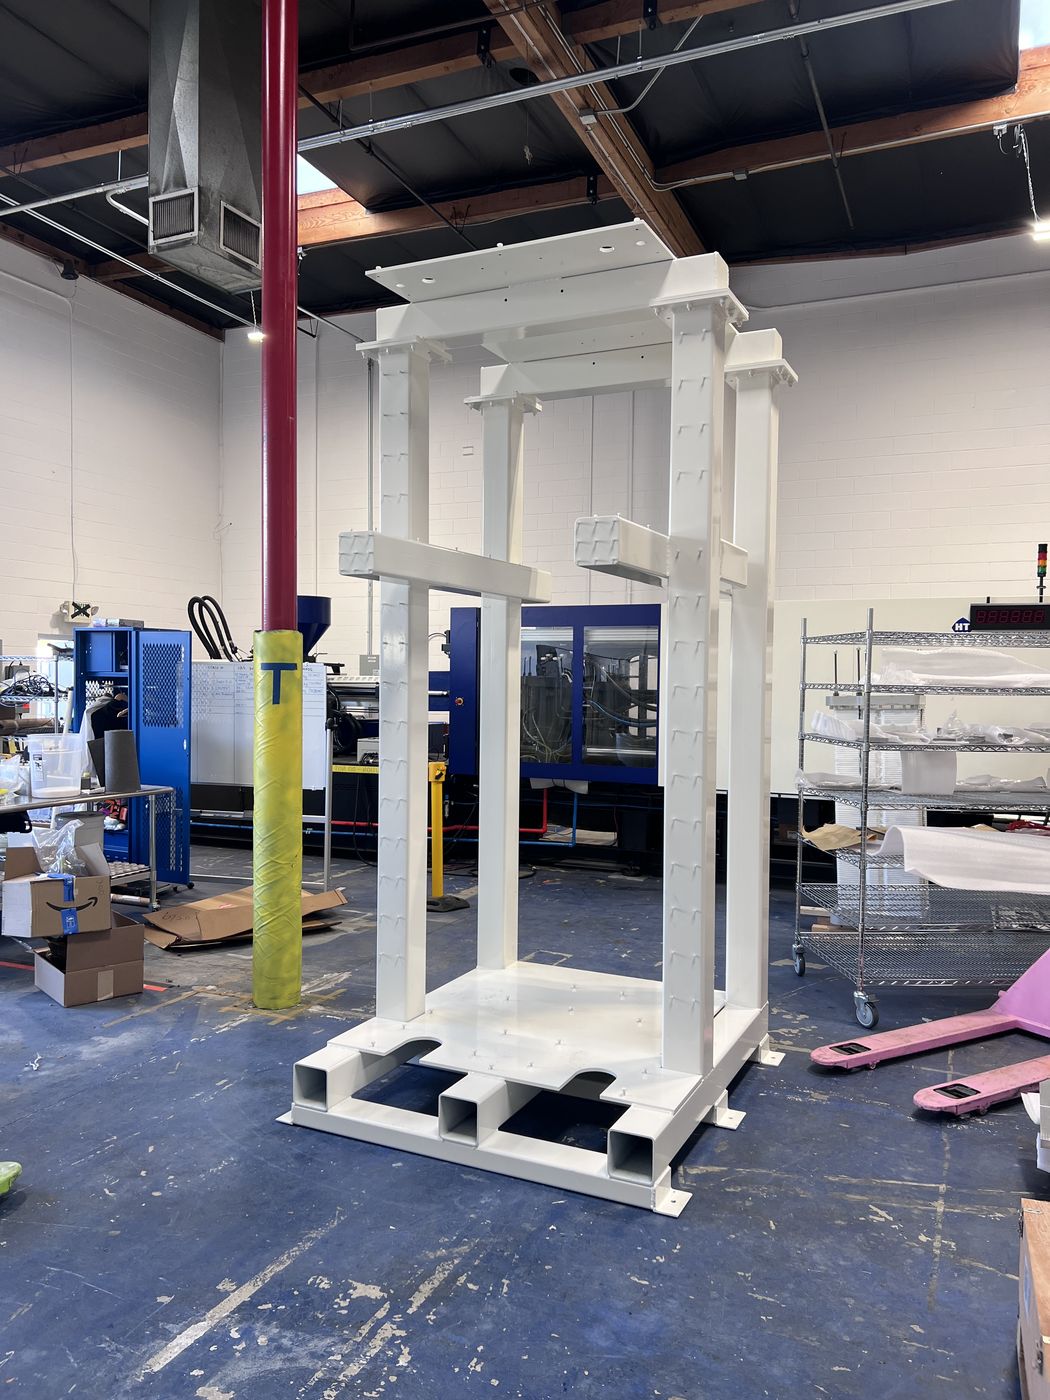
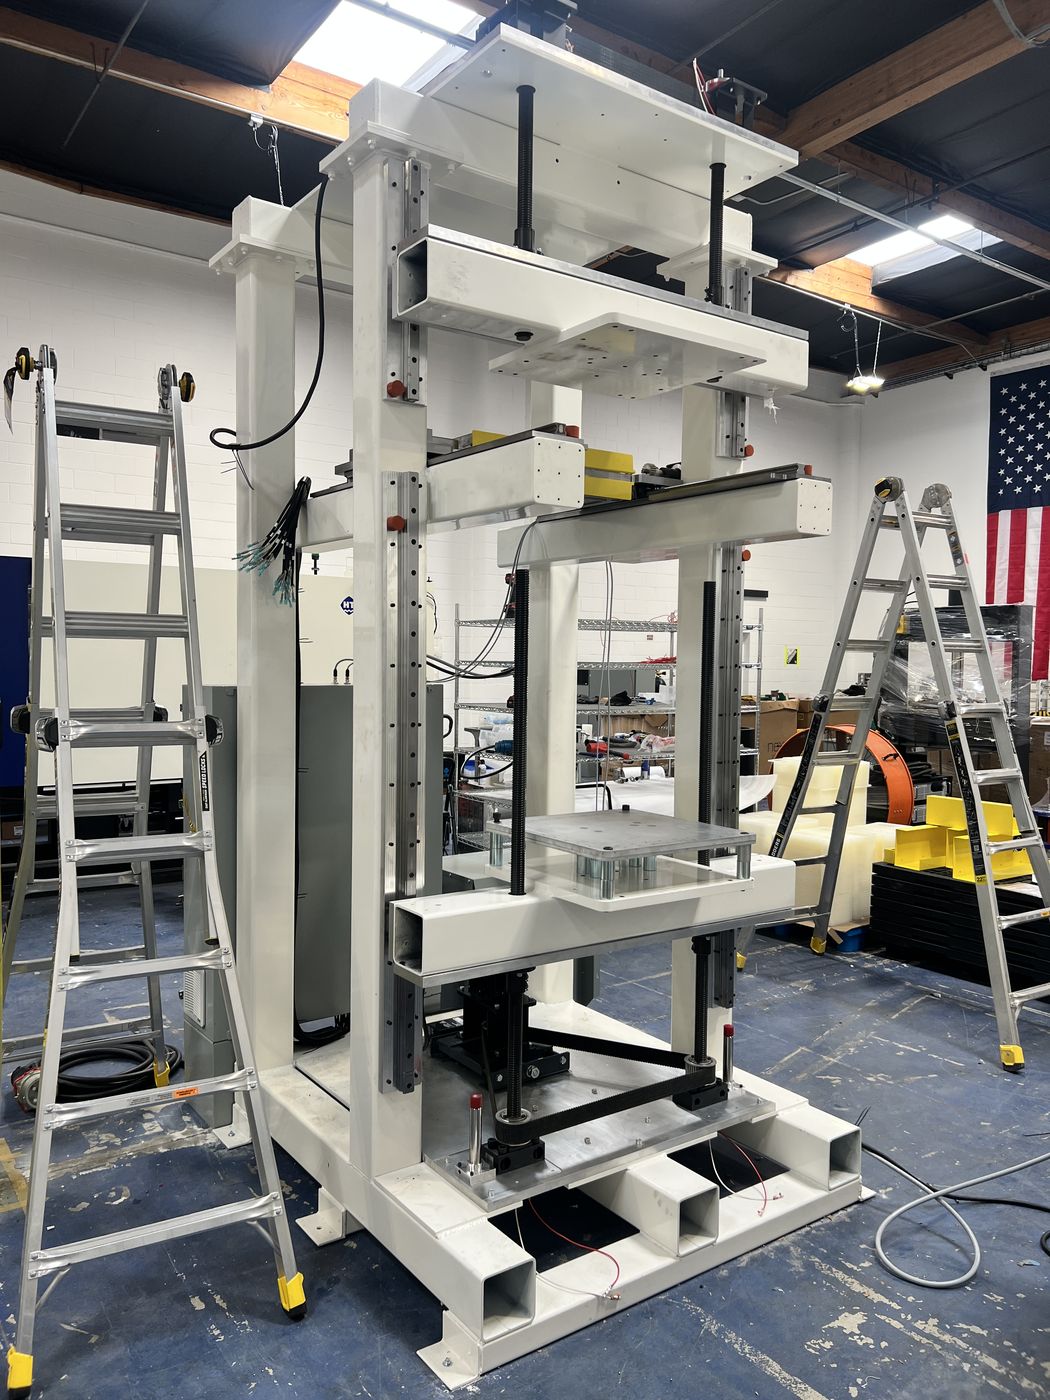
Around the hot plates is a press, and the frame looks like one: an H-frame, the layout most hydraulic presses use. At this size it had to be a weldment, so I had steel tube laser-cut and handed it to a local welder.
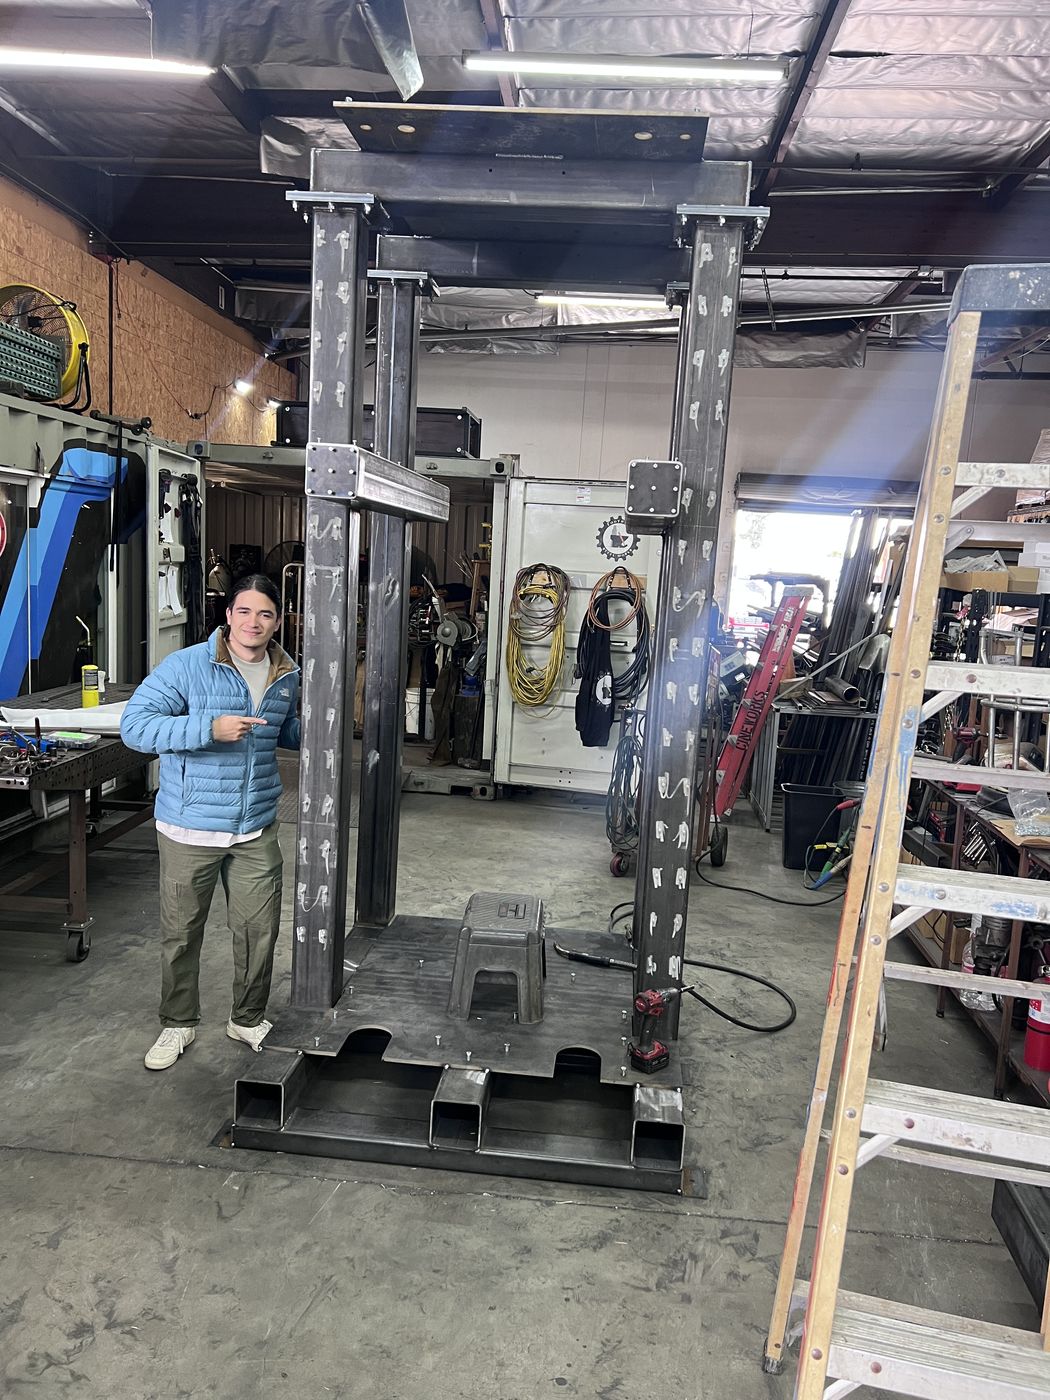
Weldments are big, strong, and imprecise, and precision machine design has a standard answer for that: let the structure be rough and make the interfaces precise. Normally you would put the finished weldment on a large mill and machine those interfaces in place. I had neither the time nor a nearby shop that could do it quickly and cheaply, so every precision surface on this machine is a separate machined plate, bolted to the frame and shimmed into position. On paper, it was a perfectly respectable compromise.
The textbook platen drive is a pair of linear rails and one large ball screw. I couldn't find a single screw that could carry the loads and still arrive on time and on budget, so each platen ended up on two rails and two ball screws, driven by one servo and kept in sync by a timing belt. Two screws and two rails on one plate is over-constrained, and I knew it. I added slotted holes to absorb the mismatch and moved on, a little too quickly.
The hot plate rides on its own carriage, driven by rack and pinion rather than a belt, since nothing soft and rubbery wants to live that close to the heat.
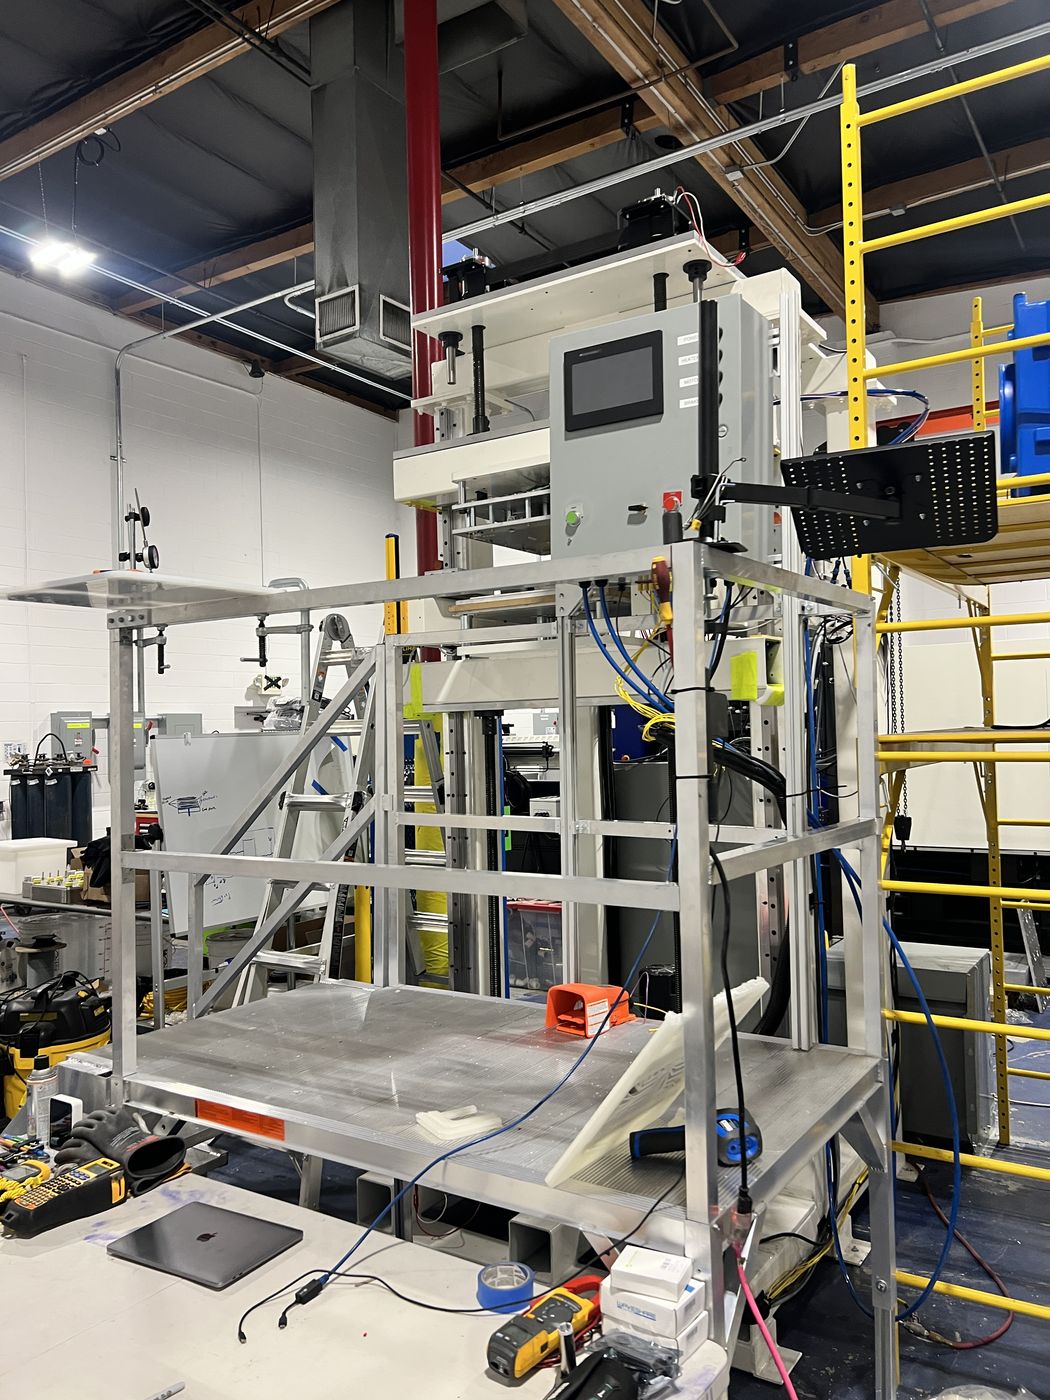
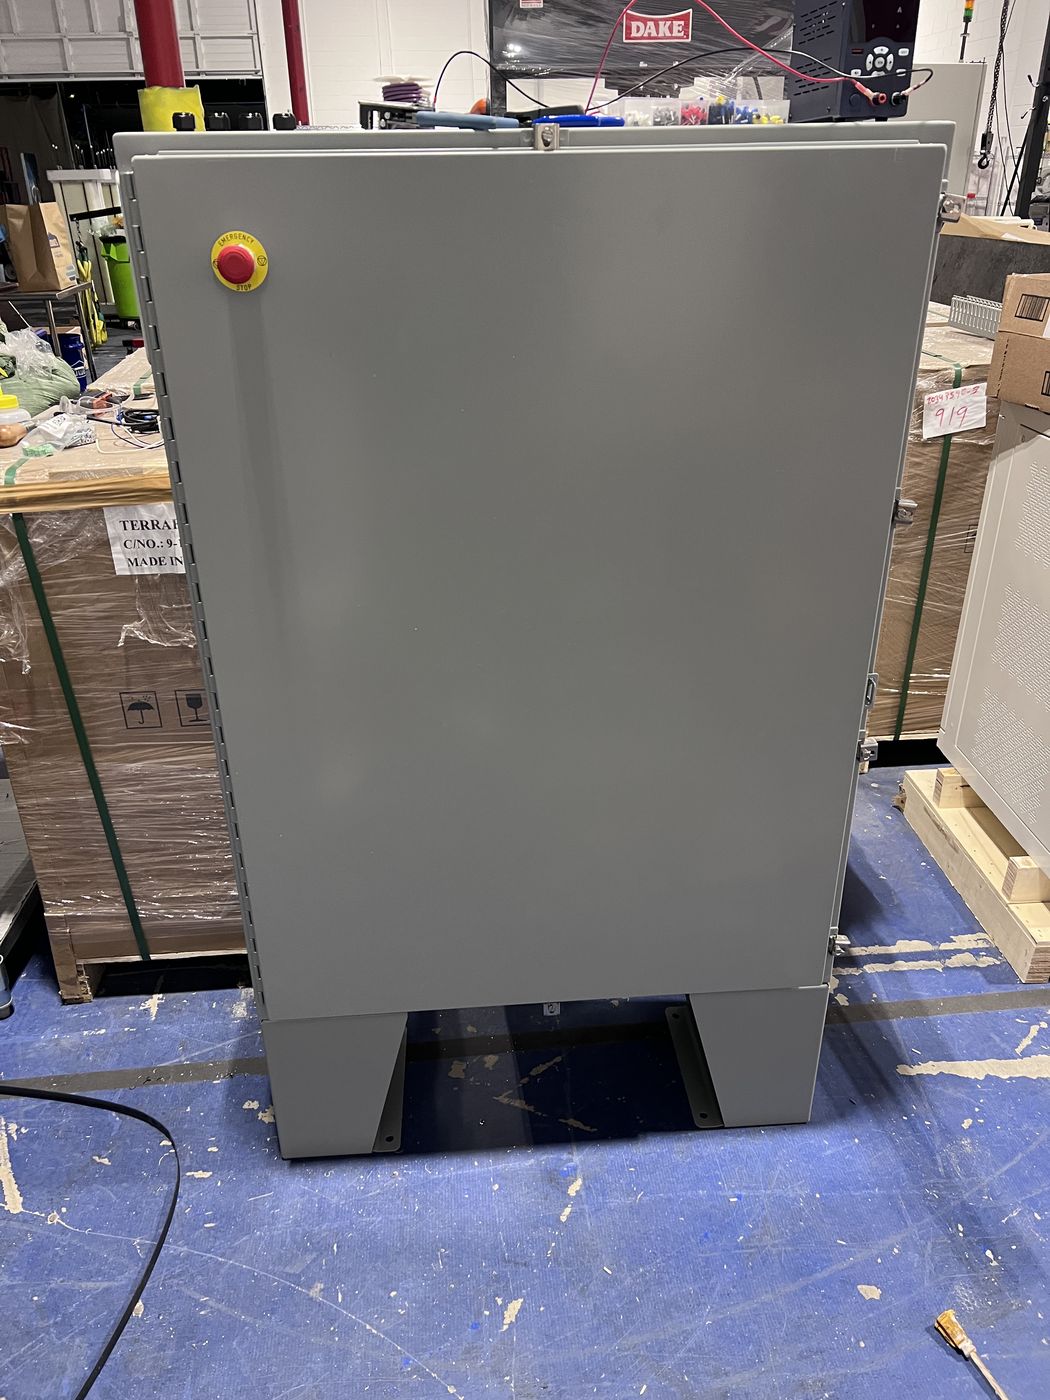
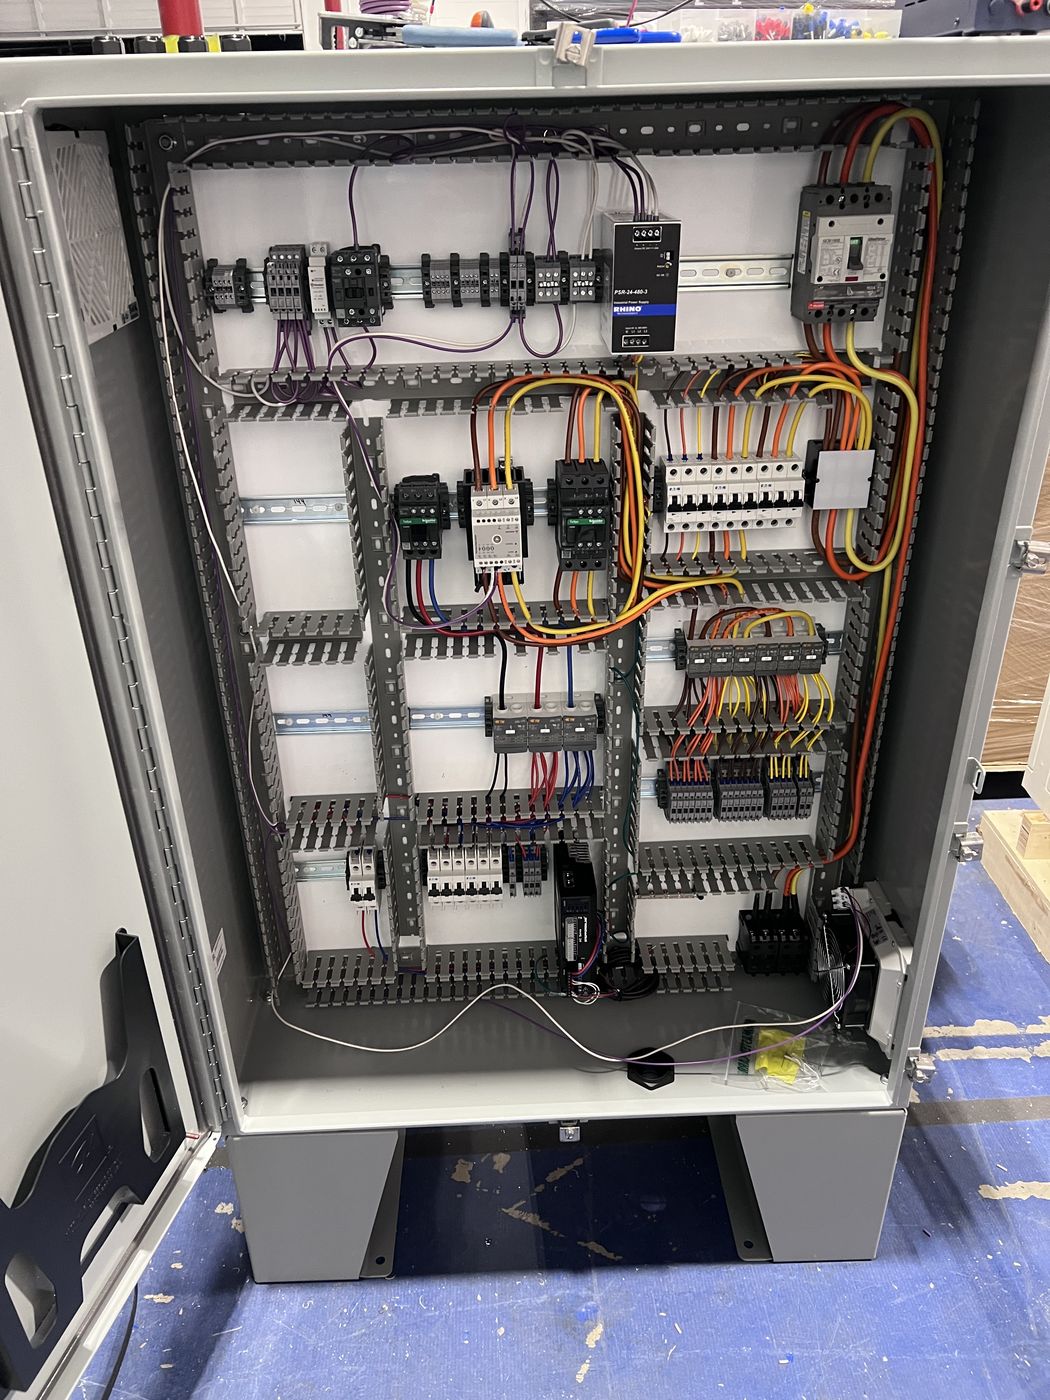
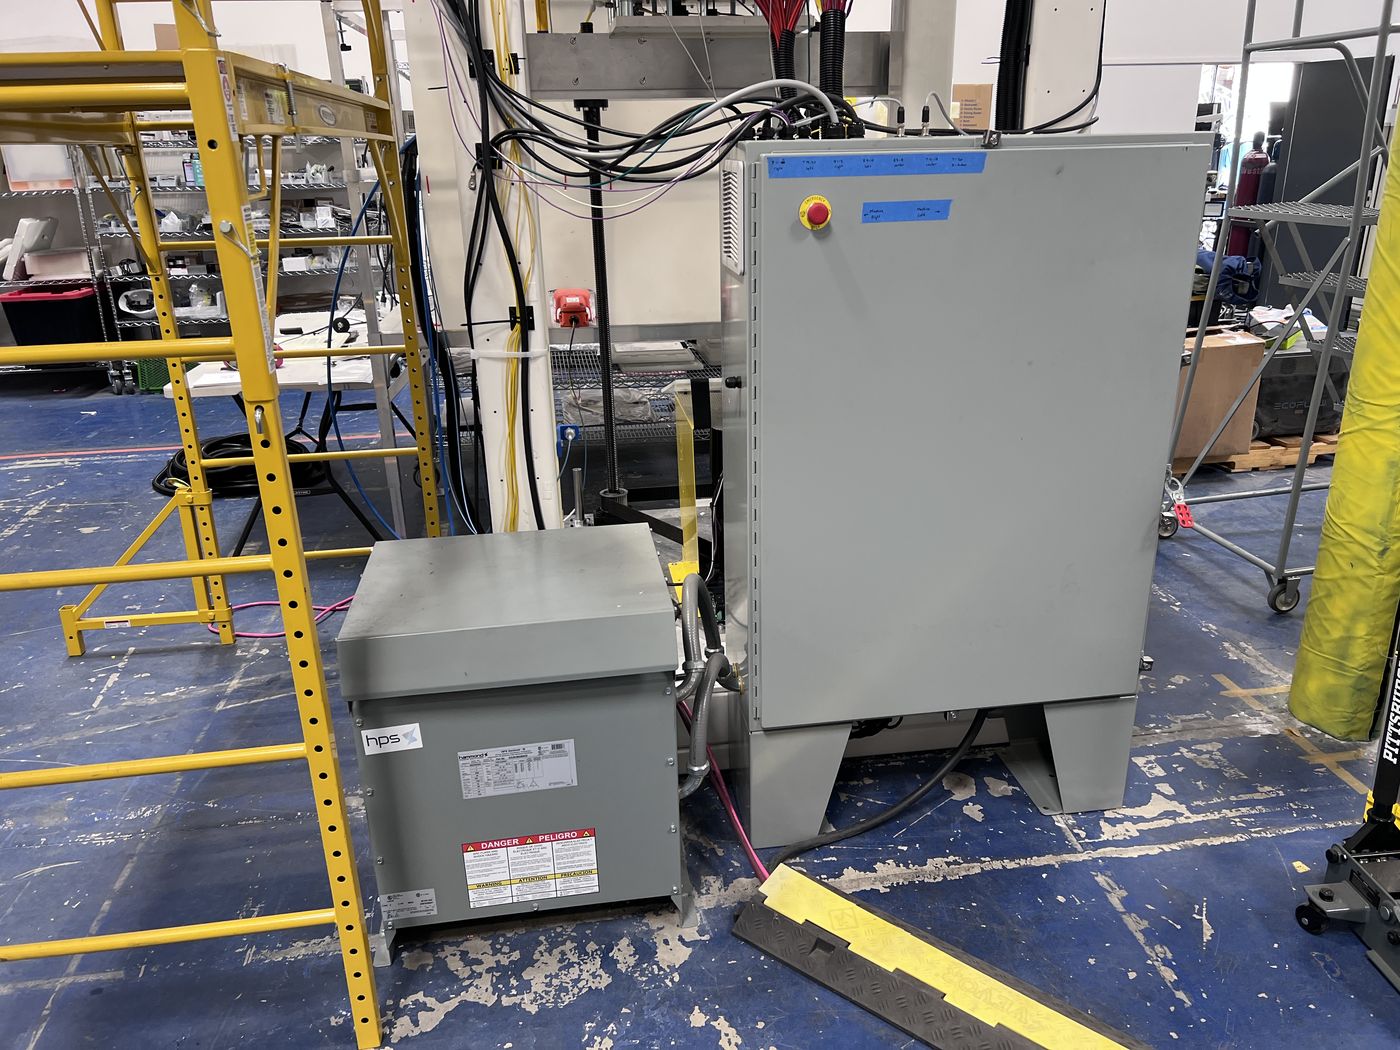
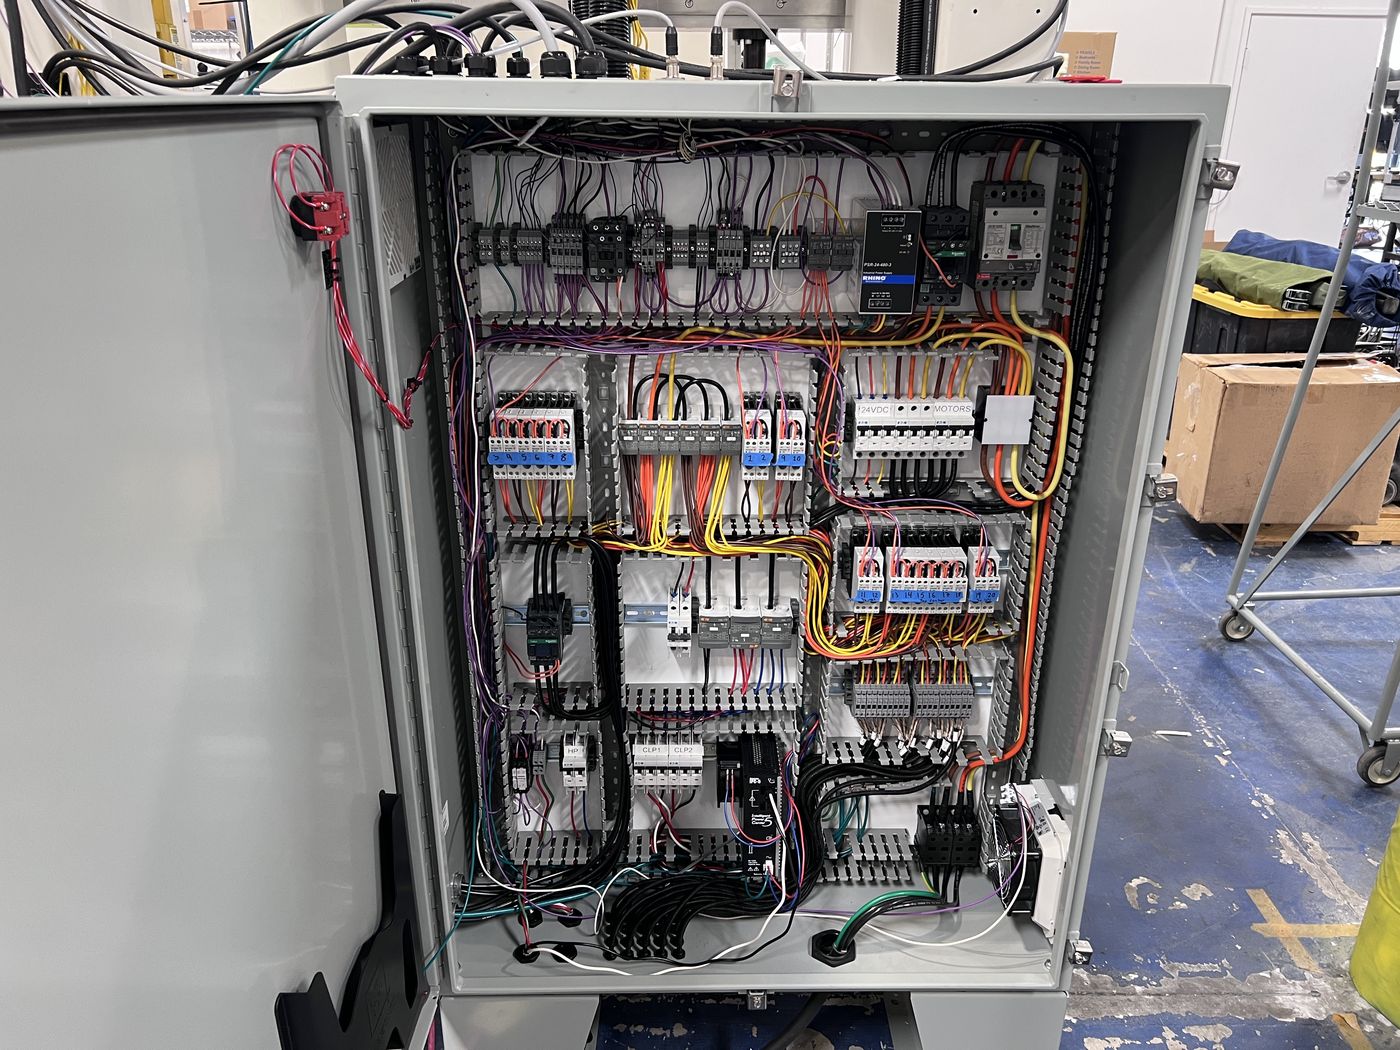
The electrical side was new territory. I'm a mechanical engineer, and school barely touched electrical systems, so I taught myself enough to design and build the machine's power distribution panel and its control panel.
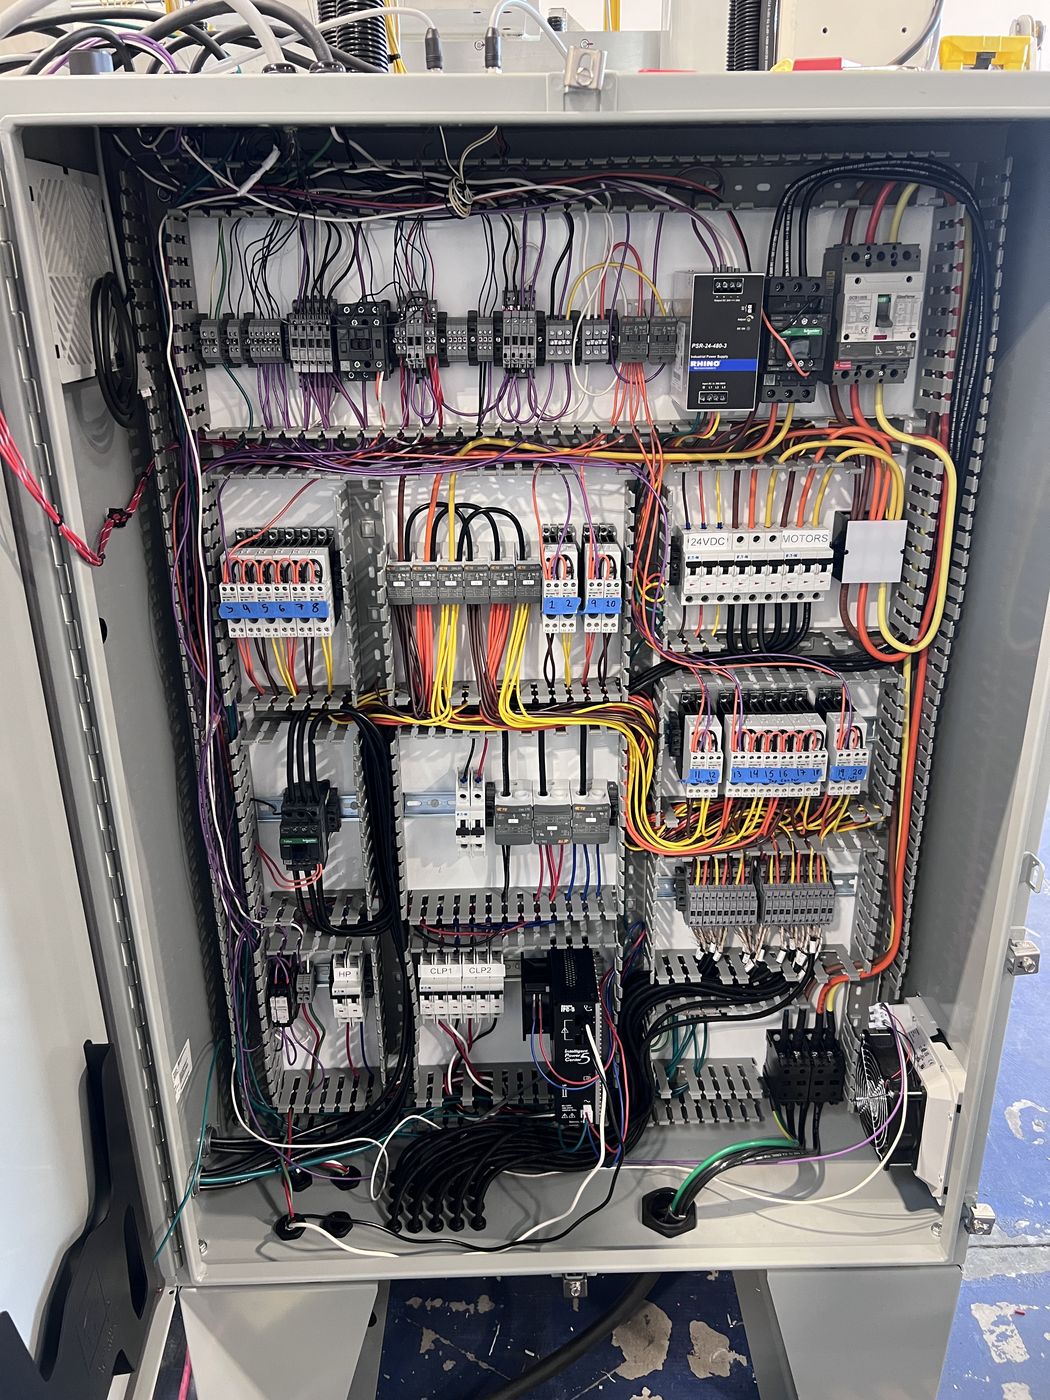
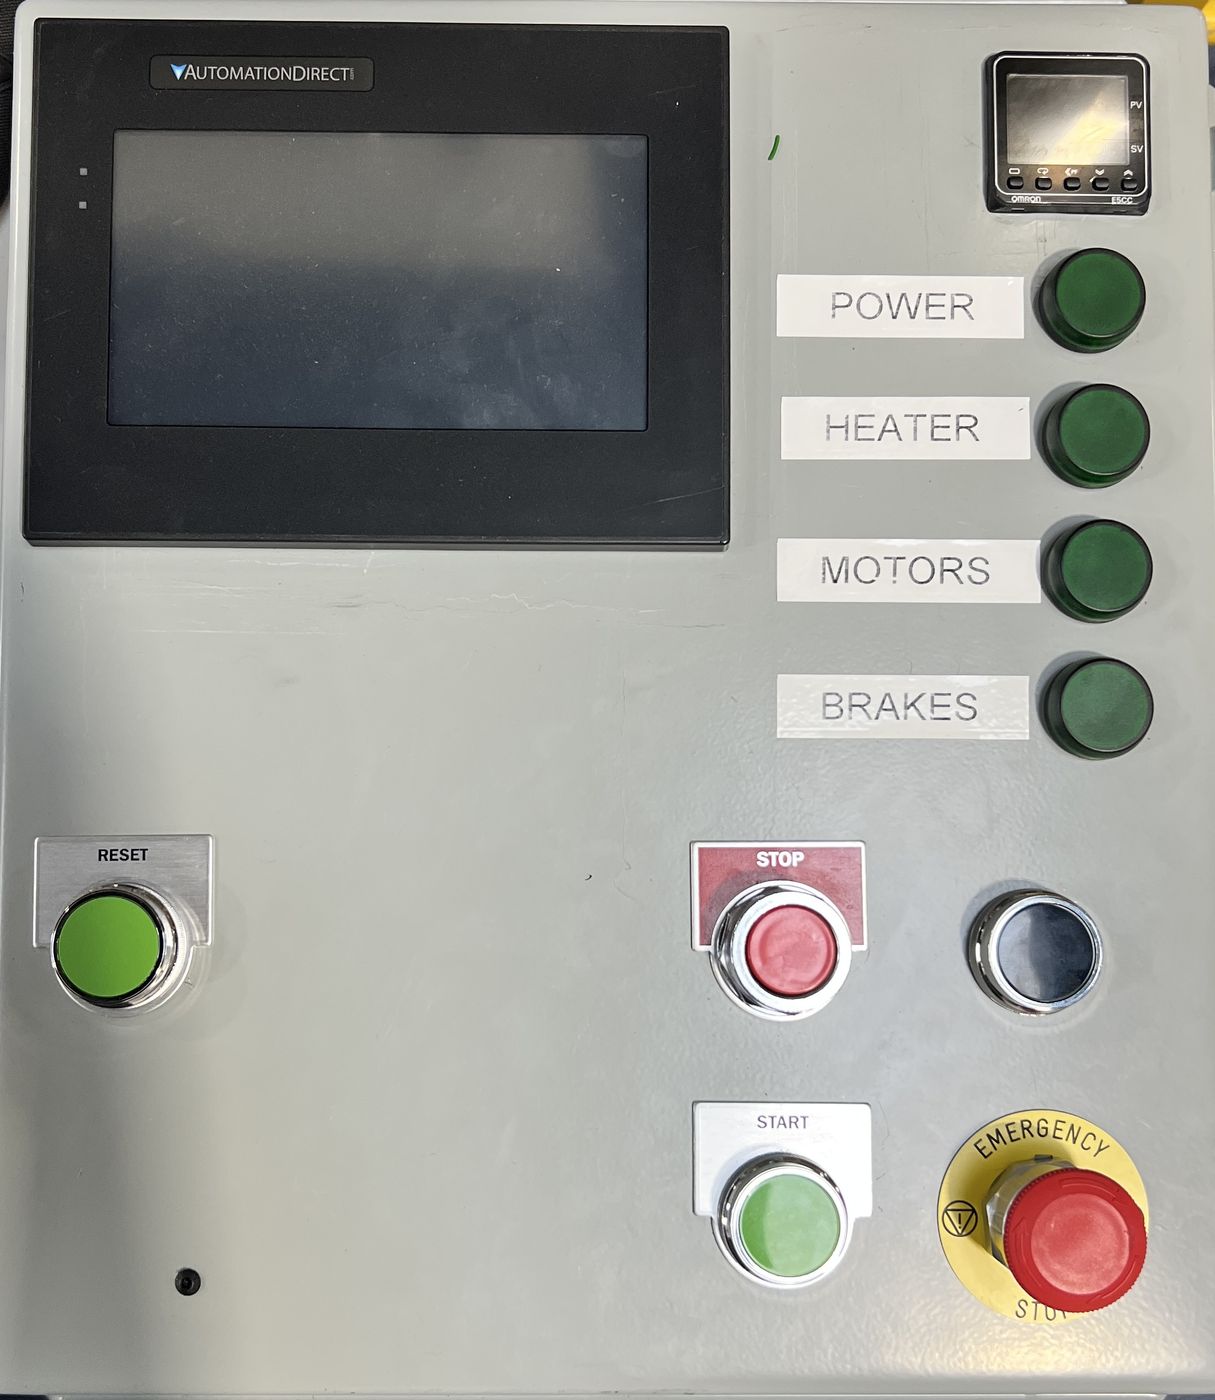
A press like this will take your arm off if you put it in the wrong place, so safety drove the design from the start. All of the safety logic is hardwired, baked into copper rather than into bits on a computer: emergency stops, light curtains, redundant safety relays, and brakes that clamp the screws the moment power drops. It went through several rounds of safety review before anyone ran it.
The operator talks to the machine through a touchscreen interface I wrote in Python. It exposes nearly every parameter, and I designed it around what I'd read about operator fatigue and error, so the machine never runs on its own. Every cycle waits for a deliberate press of Start.
Four Months, Not Two
I started building in December. I had promised two months and it took four, and nearly all of the extra time went into things that had looked simple on paper.
Shimming came first. The frame parts were too heavy for one person, so aligning them took a full week with a hoist and a forklift. On top of that, some of the holes in the tube had been drilled and tapped at an angle, which meant the bolts wouldn't pass through the precision plates. The fix was redrilling and cutting by hand, six feet off the ground, which was exactly as much fun as it sounds.
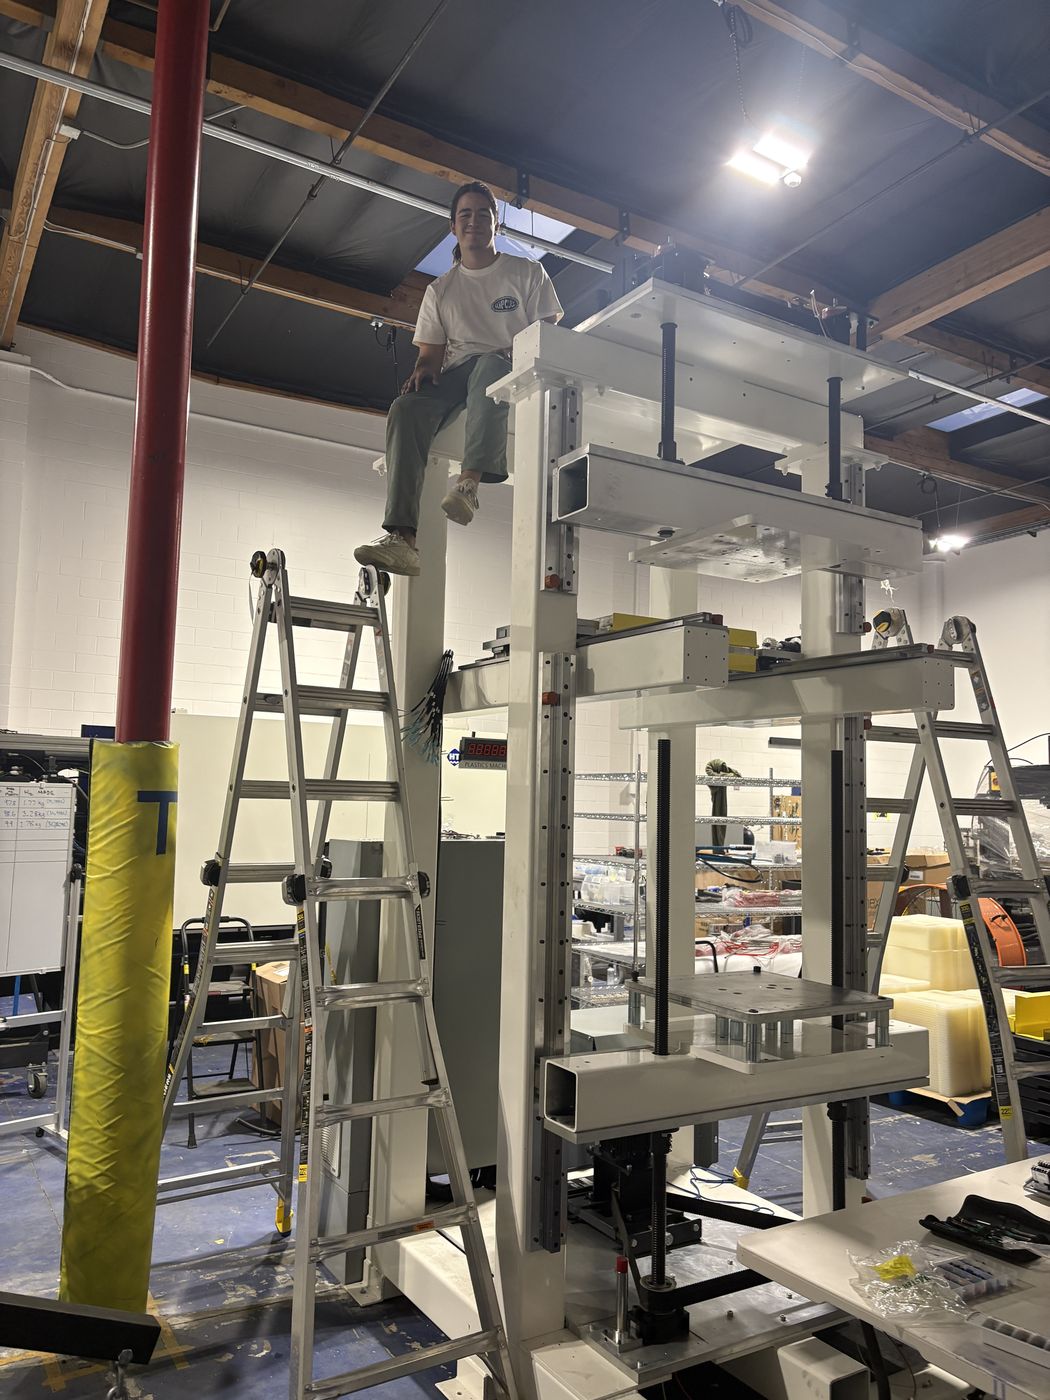
The platens were worse, and they turned out to be the single hardest problem of the project. With two ball screws driving one platen, a tiny rotational offset between them puts one ball nut a hair higher than the other, and the whole platen tilts. I attacked it with mallets, grease, and redrilling, and it would seem to go away and then quietly come back. It took months to solve, and I had to solve it twice, once for each platen. It felt like a ghost that refused to leave the machine.
And there was one problem I simply missed. Geometry and travel meant the bottom ball screws could only be supported at their base, which left their upper ends waving free like loose noodles. Drive them fast enough and they hit resonance and shook. It stayed within acceptable limits, but I hadn't seen it coming at all, and on a machine this big and this complex, that is exactly the kind of miss that can cost you far more than it cost me.
The first time I powered the heaters, several of them went off with a loud bang and visible burning. I had packed the heater bores with thermal paste to improve contact, and the paste turned out to conduct electricity as well as heat. It squeezed out onto the heater terminals and shorted them. I replaced the burnt heaters, and these days I check that a paste conducts heat and not current before it goes anywhere near a terminal.
Making It Weld
With everything finally built, the real work started. Temperature, dwell times, speeds, and force all interact, so every change moved something else. It was close to sensory overload, and in roughly equal parts the most fun and the most frustrating stretch of the whole project. On some days I pushed new code to the machine close to a hundred times.
The first real problem was temperature. The middle of each plate ran tens of degrees hotter than the edges, so part of a slice would melt while the rest sat there unbothered. Worse, I had assumed both plates lived in the same conditions and ran them off a single control loop, and they don't. The upper plate faces up, so the air it heats rises away and cooler air rushes in to replace it. The lower plate faces down, and the hot air under it has nowhere to go; it just sits there like a blanket. Same steel, same heaters, very different losses. In hindsight it's obvious, which is the most painful kind of lesson.
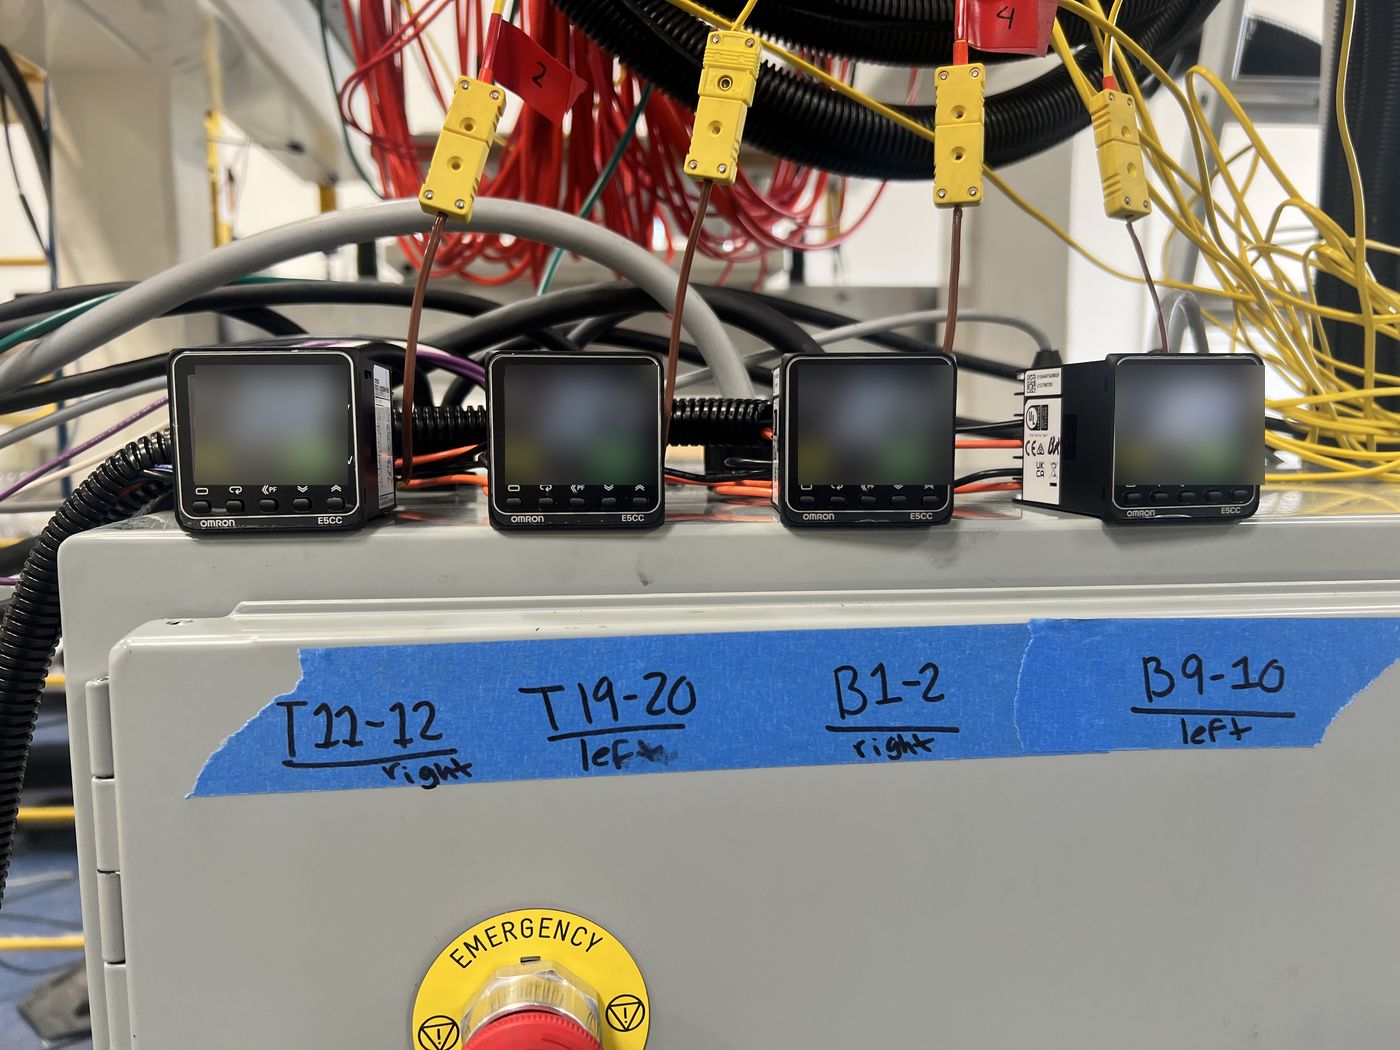
So each plate got its own loop, and then each plate got split into several zones with their own thermocouples. I'd read that multiple zones in one block of metal can end up fighting each other and oscillating, mostly in excellent conductors like copper and aluminum, and I was betting that steel conducted heat poorly enough to stay out of trouble. It did. The spread across each plate fell from tens of degrees to single digits.
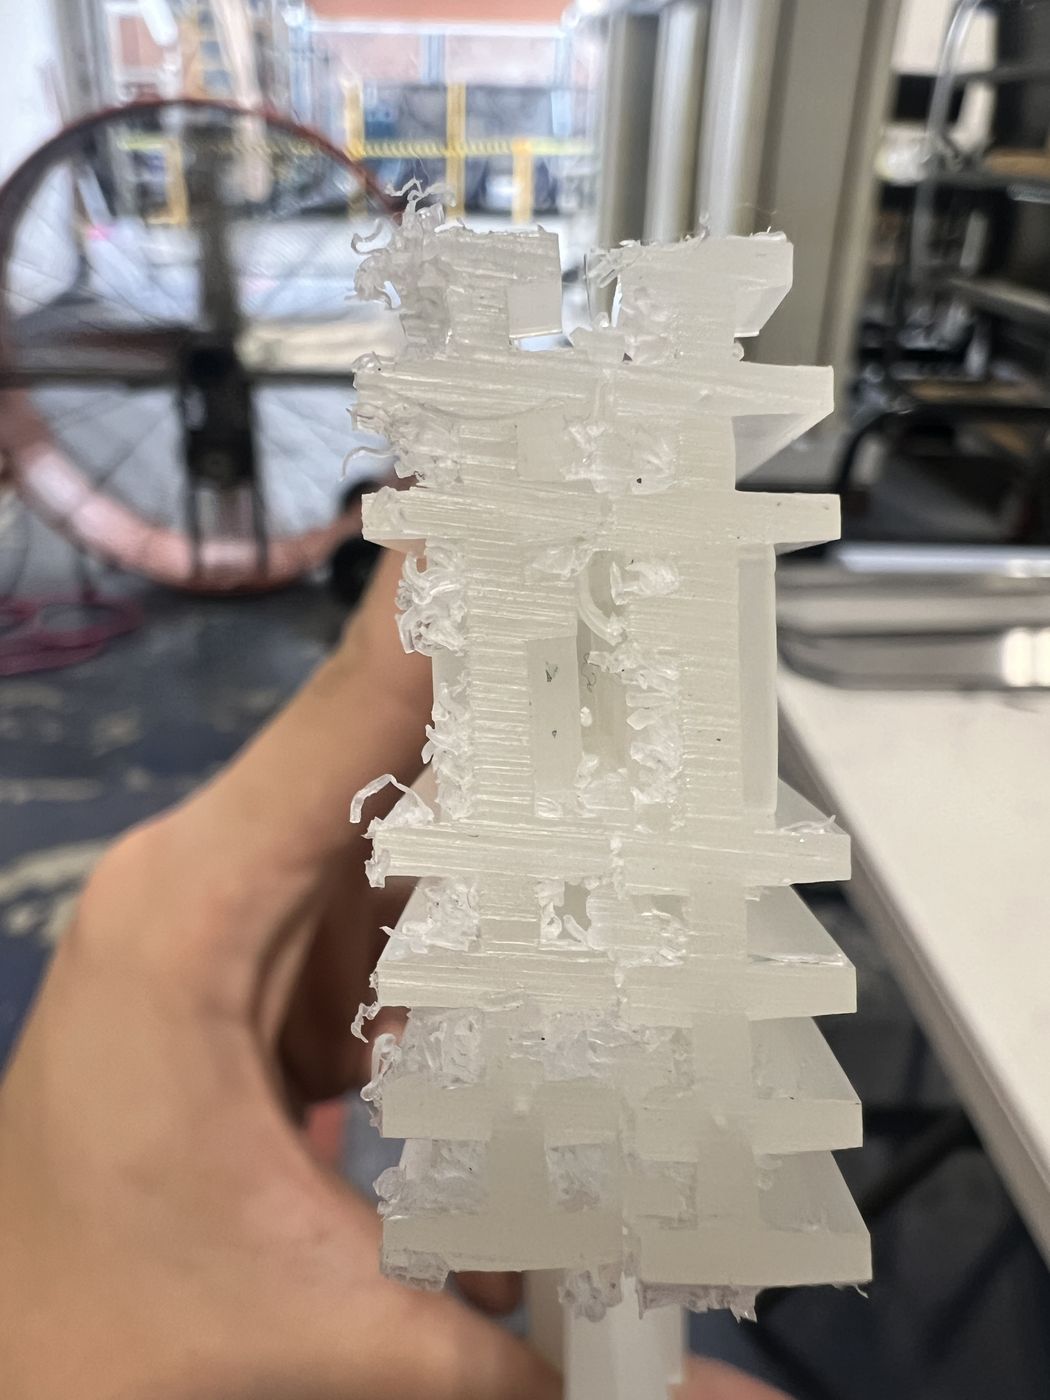
Then the plastic started sticking. Anyone who has fried eggs in a bad pan knows the feeling: the platens pulled away and left melted polypropylene welded to the plate, where it scorched and smoked. Everything I knew said to run hot, since polypropylene is an insulator and a hotter plate drives heat through it faster, so I kept the temperature up and kept making it worse. Close to giving up, I tried the opposite and ran the plates much cooler. The ribs melted clear, almost transparent, and lifted off nearly clean. It was mind-blowing.
The last piece was speed. Ripping the platens off the plate as fast as the machine could move fixed almost everything that was left, and whatever still clung on came off with a tap of a paper towel.
The first weld was two pieces of plastic held together by a tiny patch, barely. It didn't matter. They were no longer two separate pieces, and seeing them stuck together is still one of the best moments of my career.
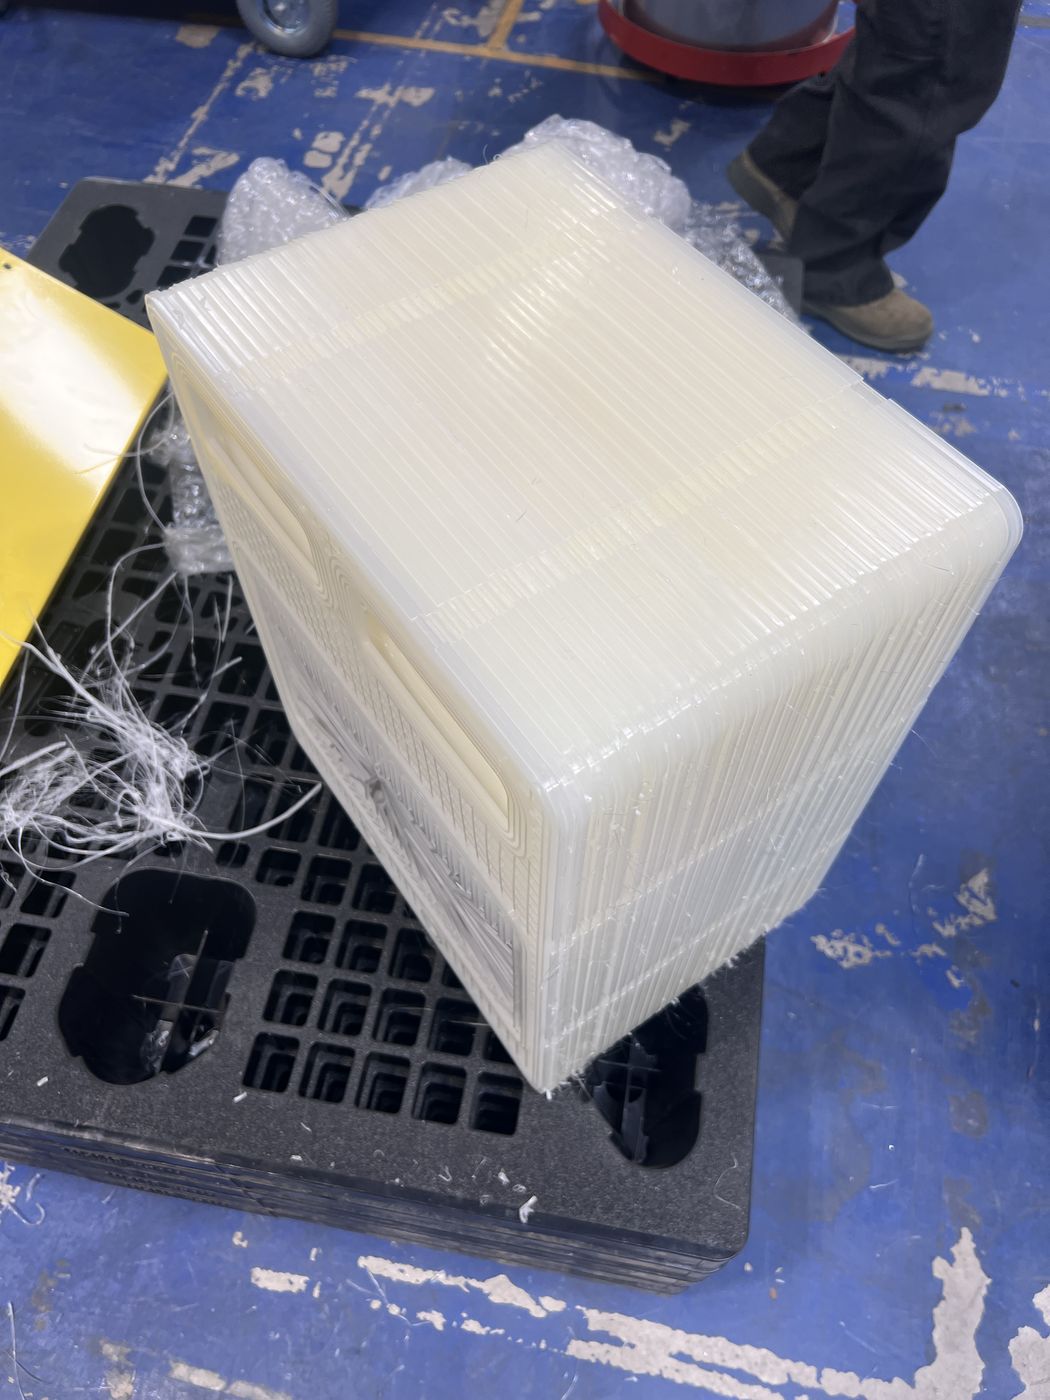
Not long after came the first good weld, and a teammate and I just kept going. By the end, a few dozen slices had become one solid block of plastic, and a quick pass with a blowtorch cleaned the stray strings off its face. Something that used to be a pile of separate parts was now one piece. That stack was my baby, and I carried it around like one.
Does It Hold?
Sticking together isn't the same as sealing, and a stack has to do both. We judged ours two ways. A pressure decay test pressurizes the stack and watches for the pressure to fall, which catches anything leaking out. Running it as an electrolyzer and measuring the purity of the gases catches the subtler failure, hydrogen and oxygen crossing over inside.
Our welds passed on purity and failed the leak test. The last month of the project went to iterating on the process, one change at a time, until the stacks held.
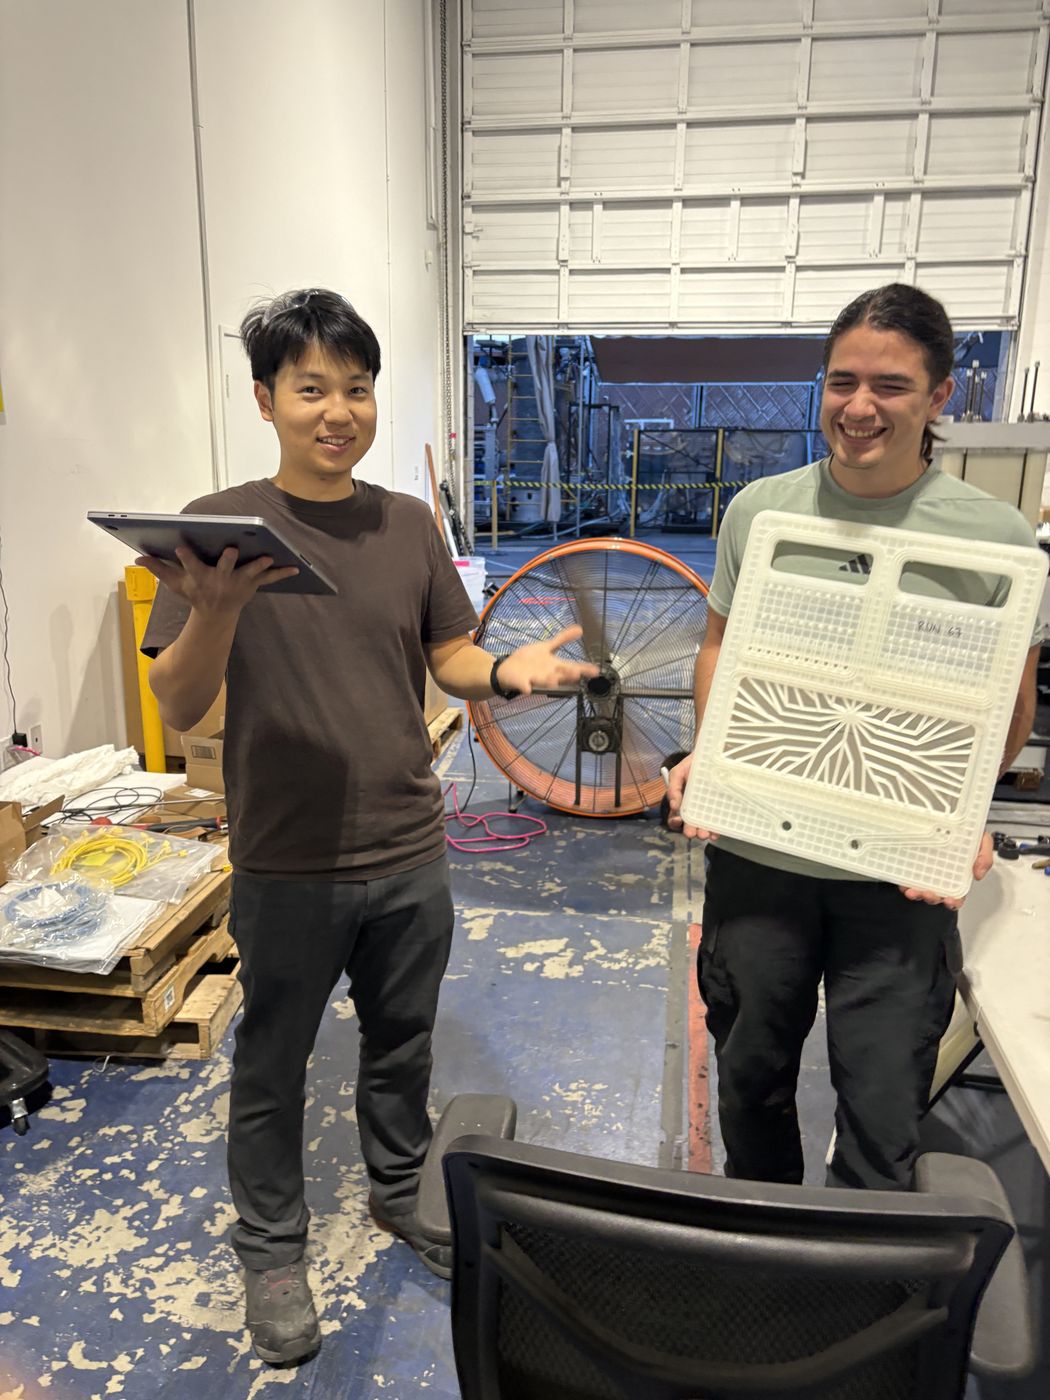
Then one held pressure. That stack was the whole point: proof that a welded stack could be built, and that it could actually do electrolysis. After that, the runs of good, sealing welds kept getting longer.
What It Proved
The architecture works. All the months of pushing for it, and all the doubts I carried while building it, paid off at once.
The machine is a V1, and it went through some rough times, but it does the job and it proved the idea. I trained three teammates to run it, and hearing their feedback is something I don't think I'll ever forget.
The next question is how many of these machines we can build, and how fast.
Gallery